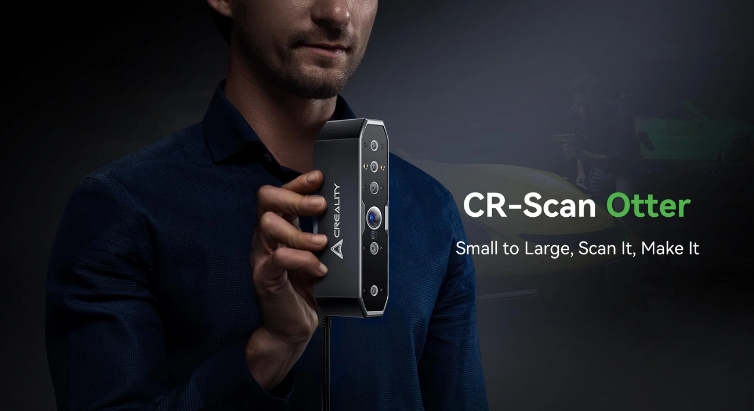
Welcome to the world of the CR-Scan Otter, Creality's latest innovation in high-precision 3D scanning technology. This all-in-one handheld device is designed to revolutionize the way you capture objects, big and small, in stunning detail and accuracy. Let's explore the intricate details and functionalities of the CR-Scan Otter as we delve into its impressive capabilities and user-friendly design.
Part1: CR-Scan Otter vs Ferret Series Specs at A Glance
Let's have a close look at the technical specifications of CR-Scan Otter and Ferret Series, including essential machine details, scan object ranges, accuracy, 3D resolution, suport system and more.
| Model | CR Scan Ferret series | CR Scan Otter | |
| Photo | 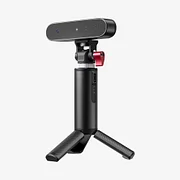 |
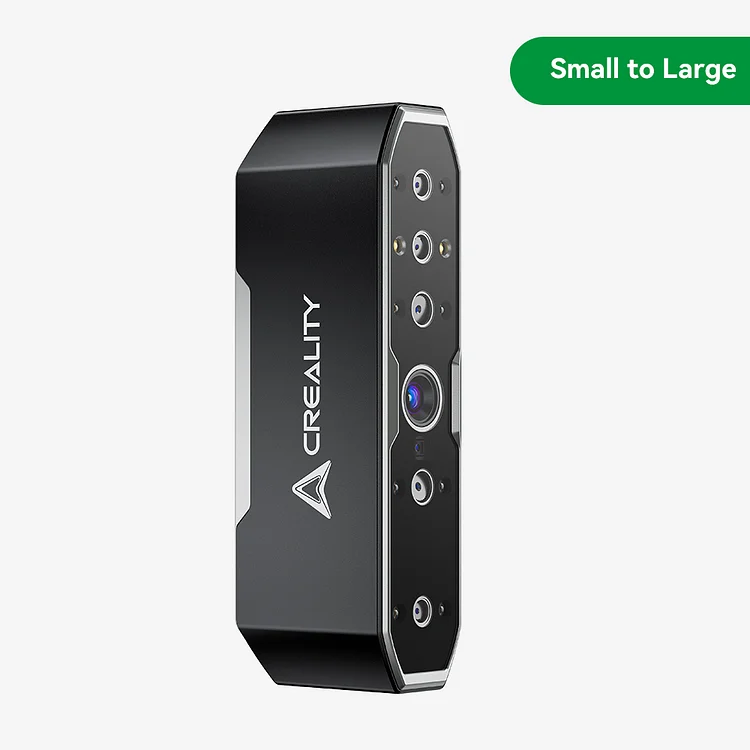 |
|
| Retail Price | $299~$449 | $799 $899 | |
| Light source | NIR Structured Light | NIR Structured Light | |
| One-shot imaging for smooth scanning |
Yes | Yes | |
| Scan Object Range | Medium, Large | Small, Medium, Large | |
| Accuracy | Up to 0.1mm | Up to 0.02mm @ 60mm | |
| Point distance/Resolution | 0.16mm | 0.05-2mm | |
| Scan speed | Up to 30fps | Up to 20fps | |
| Minimum scanning | 50×50×50mm | 10x10x10mm | |
| Single Capture range | Max. 560mm x 820mm at 700mm | Max. 1350x840mm at 1000mm | |
| Operating Systems | Windows | Yes | Yes |
| macOS | Yes | Yes | |
| Android | Yes (Ferret and Ferret Pro) | No (extended accessories coming soon) |
|
| iPhone iOS | Yes (Ferret Pro) | No (extended accessories coming soon) |
|
| Scanning environment | indoor/outdoor | indoor/outdoor | |
| Color scan | Yes | Yes | |
| Black objects scanning | Yes | Yes | |
| Output format | OBJ/STL/PLY | OBJ/STL/PLY | |
| Scanner weight | 105g | 390g | |
| Scanner dimensions | 120×30×26mm | 165mmx37mmx59mm | |
Part 2: CR-Scan Otter Product Details
The CR-Scan Otter is a high-precision, all-in-one 3D scanner that excels in capturing objects of various sizes with incredible accuracy. With a maximum precision of 0.02mm, this scanner is compatible with scanning small screws, human bodies, and even large automotive components. Its innovative four-eye stereoscopic vision design comprises both large and short focal length binoculars, enabling detailed capture of small to large objects with minimal loss during scanning.
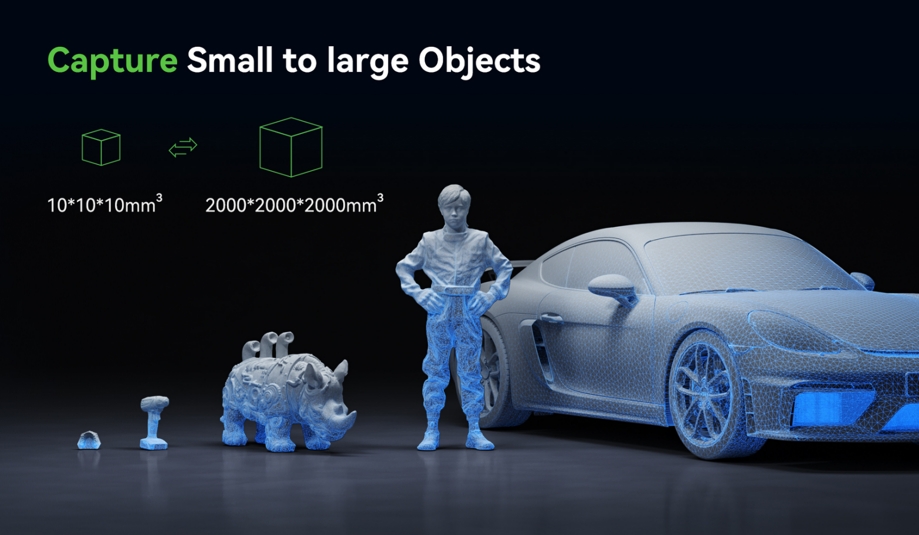
Equipped with a depth computing specialized chip developed by Creality, the Otter ensures smooth scanning operations with a maximum frame rate of up to 20fps. Utilizing unique single-frame 3D imaging technology and DOE structured light projection technology, it delivers exceptional anti-shake performance and can perform 3D scans even in outdoor environments with up to 30,000 lux of light. The inclusion of professional-grade texture supplemental light allows for high-quality full-color scans, even in low-light conditions, providing realistic textures for scanned objects.
The all-metal body of the Otter facilitates excellent heat dissipation and operates silently, thanks to its fanless design. User-friendly features such as touch buttons, interactive indicators, and audible feedback enhance the overall scanning experience, making operation convenient and effortless.
Part 3: How to Use Otter 3D Scanner
1. Button Instructions
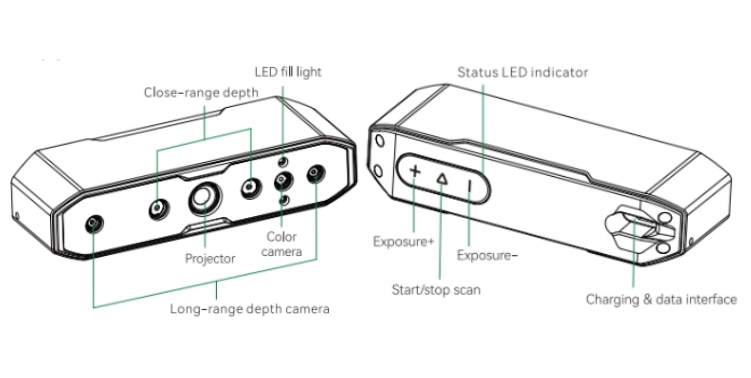
The Otter 3D scanner differs from the Ferret series in its button configuration. It features three tactile buttons and a ring indicator light that provide real-time updates on the scanning process status. These buttons enable users to make immediate exposure adjustments for a more intuitive scanning experience.
- To increase the IR camera exposure by one level, press the "+" button once, indicated by a single flash of the indicator light.
- Press the "-" button once to decrease the IR camera exposure by one level, also represented by a single flash of the indicator light.
- The "▷" button has multiple functions:
- A short press once initiates the scanning process.
- Another short press pauses the scanning.
- For stopping the scan, perform a long press of 3 seconds or more.
2. LED Indication Strip
The Otter 3D scanner utilizes an innovative four-eye lens stereo vision design, designed to cater to scanning objects of various sizes. This design includes two sets of dual lenses tailored for capturing detailed information across different object dimensions.
- Telephoto dual lenses: Capture detailed information of smaller objects at close range.
- Short-focus dual lenses: Provide a broader field of view for scanning larger objects, ensuring stable tracking while minimizing detail loss.
Enhanced by two white RGB color fill lights for realistic full-color scanning and eight calibrated point infrared LED fill lights, the Otter scanner excels in adapting to diverse scanning environments. The indicator light color during scanning signifies different statuses and scanning distances for optimal scanning results:
- Green: Normal operation or moderate scanning distance.
- Red flashing: Abnormal state.
- Yellow flashing: Indicates an upgrade status.
- Orange-red: Scanning distance too close.
- Orange: Closer scanning distance.
- Light blue: Longer scanning distance.
- Dark blue: Scanning distance too far.
3. Otter Connection Guide
There are two methods to connect the Otter 3D scanner to a computer:
- Method 1: Connect the scanner to a USB 3.0 port on the computer using a USB 3.0 data cable (identifiable by their blue or red color).
- Method 2: If the computer lacks USB 3.0 ports or requires additional power supply, utilize the USB 2.0 power cable for auxiliary power. Connect the USB 2.0 cable to the middle port of the USB 3.0 and the other end to another port on the computer, or use a 5V charger for auxiliary power supply.
Part 4: FAQs about Otter Scanner Use
1. How to achieve better model details?
To enhance model details when scanning with the Otter 3D scanner, consider the following:
- Adjust the exposure time of the IR camera to ensure moderate exposure without overexposure (red) or underexposure (blue).
- Maintain an optimal scanning distance for better detail capture.
- Use a smaller point distance during point cloud optimization.
- Ensure a sufficient number of model faces during meshing.
2. How to scan the bottom of an object?
Utilize Creality Scan's multi-project merging feature to obtain a complete model of an object by scanning from different orientations and merging the scans together.
3. When do you need to use a scanning pad?
When scanning smaller objects, consider using a scanning pad with marker points to facilitate tracking and scanning accuracy.
4. When do you need to use the USB 2.0 power cable?
Use the USB 2.0 power cable when the scanner requires additional power due to insufficient supply from the computer’s USB 3.0 port.
5. When do you need to use marker point mode or texture mode?
Select marker point mode when surface geometry is not distinct, and texture mode when the object surface has rich textures for scanning.
6. When is calibration necessary?
Calibration is necessary after prolonged periods of inactivity or if the device has been subjected to impact.
For more information on using the Otter 3D scanner effectively, refer to the user manual or reach out to our support team for assistance.

