


ENDER 3 BED LEVELINGA The term “bed leveling” is actually a misnomer. You’re not making it level with the ground but placing it so that the nozzle tip is at the same, correct distance over the entire surface of the build surface. This is important because the first layer in a build is the main support for the rest of the print. In order to achieve a solid base, the bed must be properly oriented to provide the correct adhesion and delivery of the printing material. If the nozzle is too far from the bed, the filament won’t adhere to the build plate at all. Too close and the nozzle will push past the layer height, preventing the material from extruding and sticking. Either way, the foundation will be unsatisfactory. The sweet spot is when the nozzle allows some space but applies just a little pressure to the flowing filament in order to help it adhere to the build plate. The Ender 3 doesn’t have an auto-leveling feature, so you have to level the bed manually. Fortunately, this isn’t too difficult and is aided by some of the printer’s features. The menu provides actions that prepare the device for leveling, and the four large knobs under each corner of the bed make the job easy. You’ll find that once leveled, the bed will stay that way for some time. Periodic re-leveling may be necessary but once the procedure is learned it should take less than five minutes to re-level each time. Before starting to level the Ender 3’s bed, there are a few things you should do to get the machine ready: Note that it’s not necessary to preheat the bed or the nozzle for bed leveling. ENDER 3 BED LEVELING To prepare for leveling you have to position the nozzle and bed. The Ender 3 controls make this easy. ENDER 3 BED LEVELING The only tool you need to level your bed is a piece of printer paper. Once equipped, you’re ready to go: Congratulations! You’re now ready to print on a leveled bed! Originally published at https://all3dp.com on January 26, 2019.Solid Foundation

Prepping the Plate and Nozzle

Prepping the Machine

Leveling the Bed


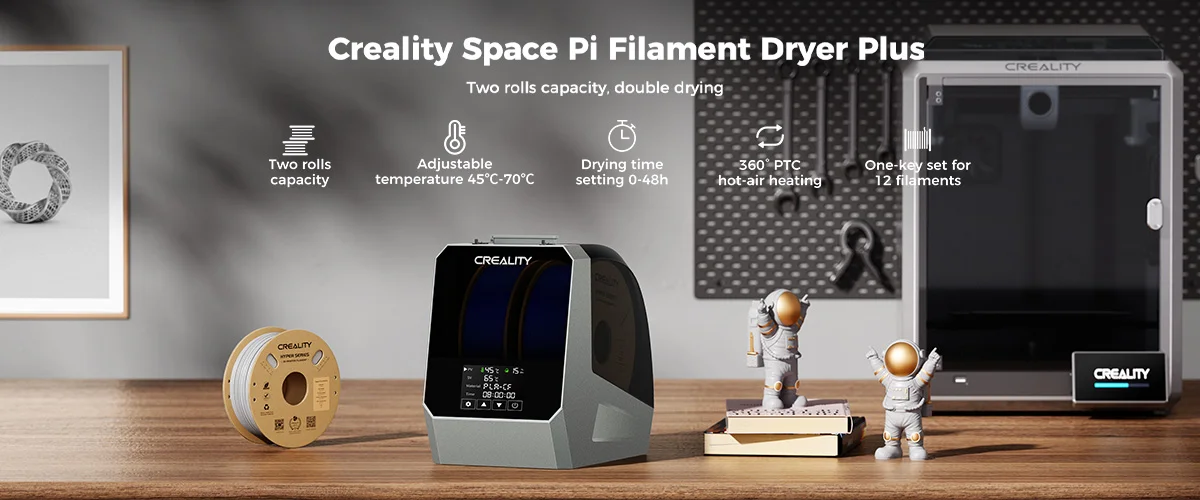
Ensure perfect 3D prints with Creality Space Pi Filament Dryers. These dryers eliminate moisture with advanced PTC heating, maintaining optimal filament condition for smooth and consistent printing results. Perfect for any 3D printing enthusiast.
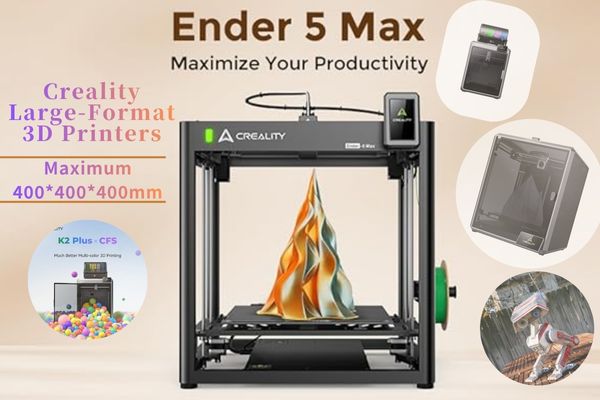
1.Creality Ender-5Max 3d Printer - 400*400*400mm build volume
2.Creality K2 Plus Combo 3d Printer - 350*350*350mm build volume
3. Creality K1 Max 3d Printer -300*300*300mm build volume
4. Creality K2 Pro Combo 3d Printer -300*300*300mm build volume
5.Creality K2 Combo 3d Printer - 260*260*260mm build volume
.jpg)
Discover the Creality K1 Max, the best home 3D printer. With a 300x300x300mm build volume, 600mm/s print speed, and eco-friendly efficiency, it redefines speed, precision, and reliability. Perfect for hobbyists and professionals, elevate your 3D printing with the K1 Max.