The extrusion system means so much for 3d printers. A well-calibrated extruder shall block you from many 3d printing issues and imperfections. You won’t like gaps, weakened layers, clogging, and warping caused by under-extrusion, nor expect over-extrusion that leads to Oozing, stringing, blobbing, details loss, etc.
The just adequate extrusion amount is the goal we calibrate for. But how? Let’s figure that out in this blog.
Table of contents:
- Confirm under/over extrusion
1.1 Preparation
1.2 Measure the extra extrusion&difference
1.3 Calculate the actual extrusion speed - Calibrate e-steps on the 3d printer
- Calibrate e-steps using Pronterface
- Calibrate extrusion by adjusting the flow rate
4.1 Calculate the flow rate ratio
4.2 Adjusting the flow rate on the printer
4.3 Adjusting the flow rate in the slicer - Extruder grinding filament
5.1 Unclog the hotend
5.2 Loosen the grip of the feeder gear - Calibrate printing temperature
- Other causes
1. Confirm under/over extrusion
In order to determine whether the extruder is having an over/under extrusion issue, we will need to measure the actual extrusion for a preset length, then compare the numbers to see the degree of match. If not matching, by how much?
1.1 Preparations
In order to complete the measurement of the actual extrusion volume, we need a scale or vernier caliper with a measuring scale larger than 100mm, an oil pen, and a roll of filament in good condition.
1.2 Measure the extra extrusion&difference
(1) Preheat the filament to regular printing temperature(regular PLA 195℃)
(2) Make a mark on the filament with an oil-based pen as the “start point”
(3) Make a mark with an oil-based pen at the position where the filament section is 100 mm from the “start point”, and make a second mark 20mm after the first mark.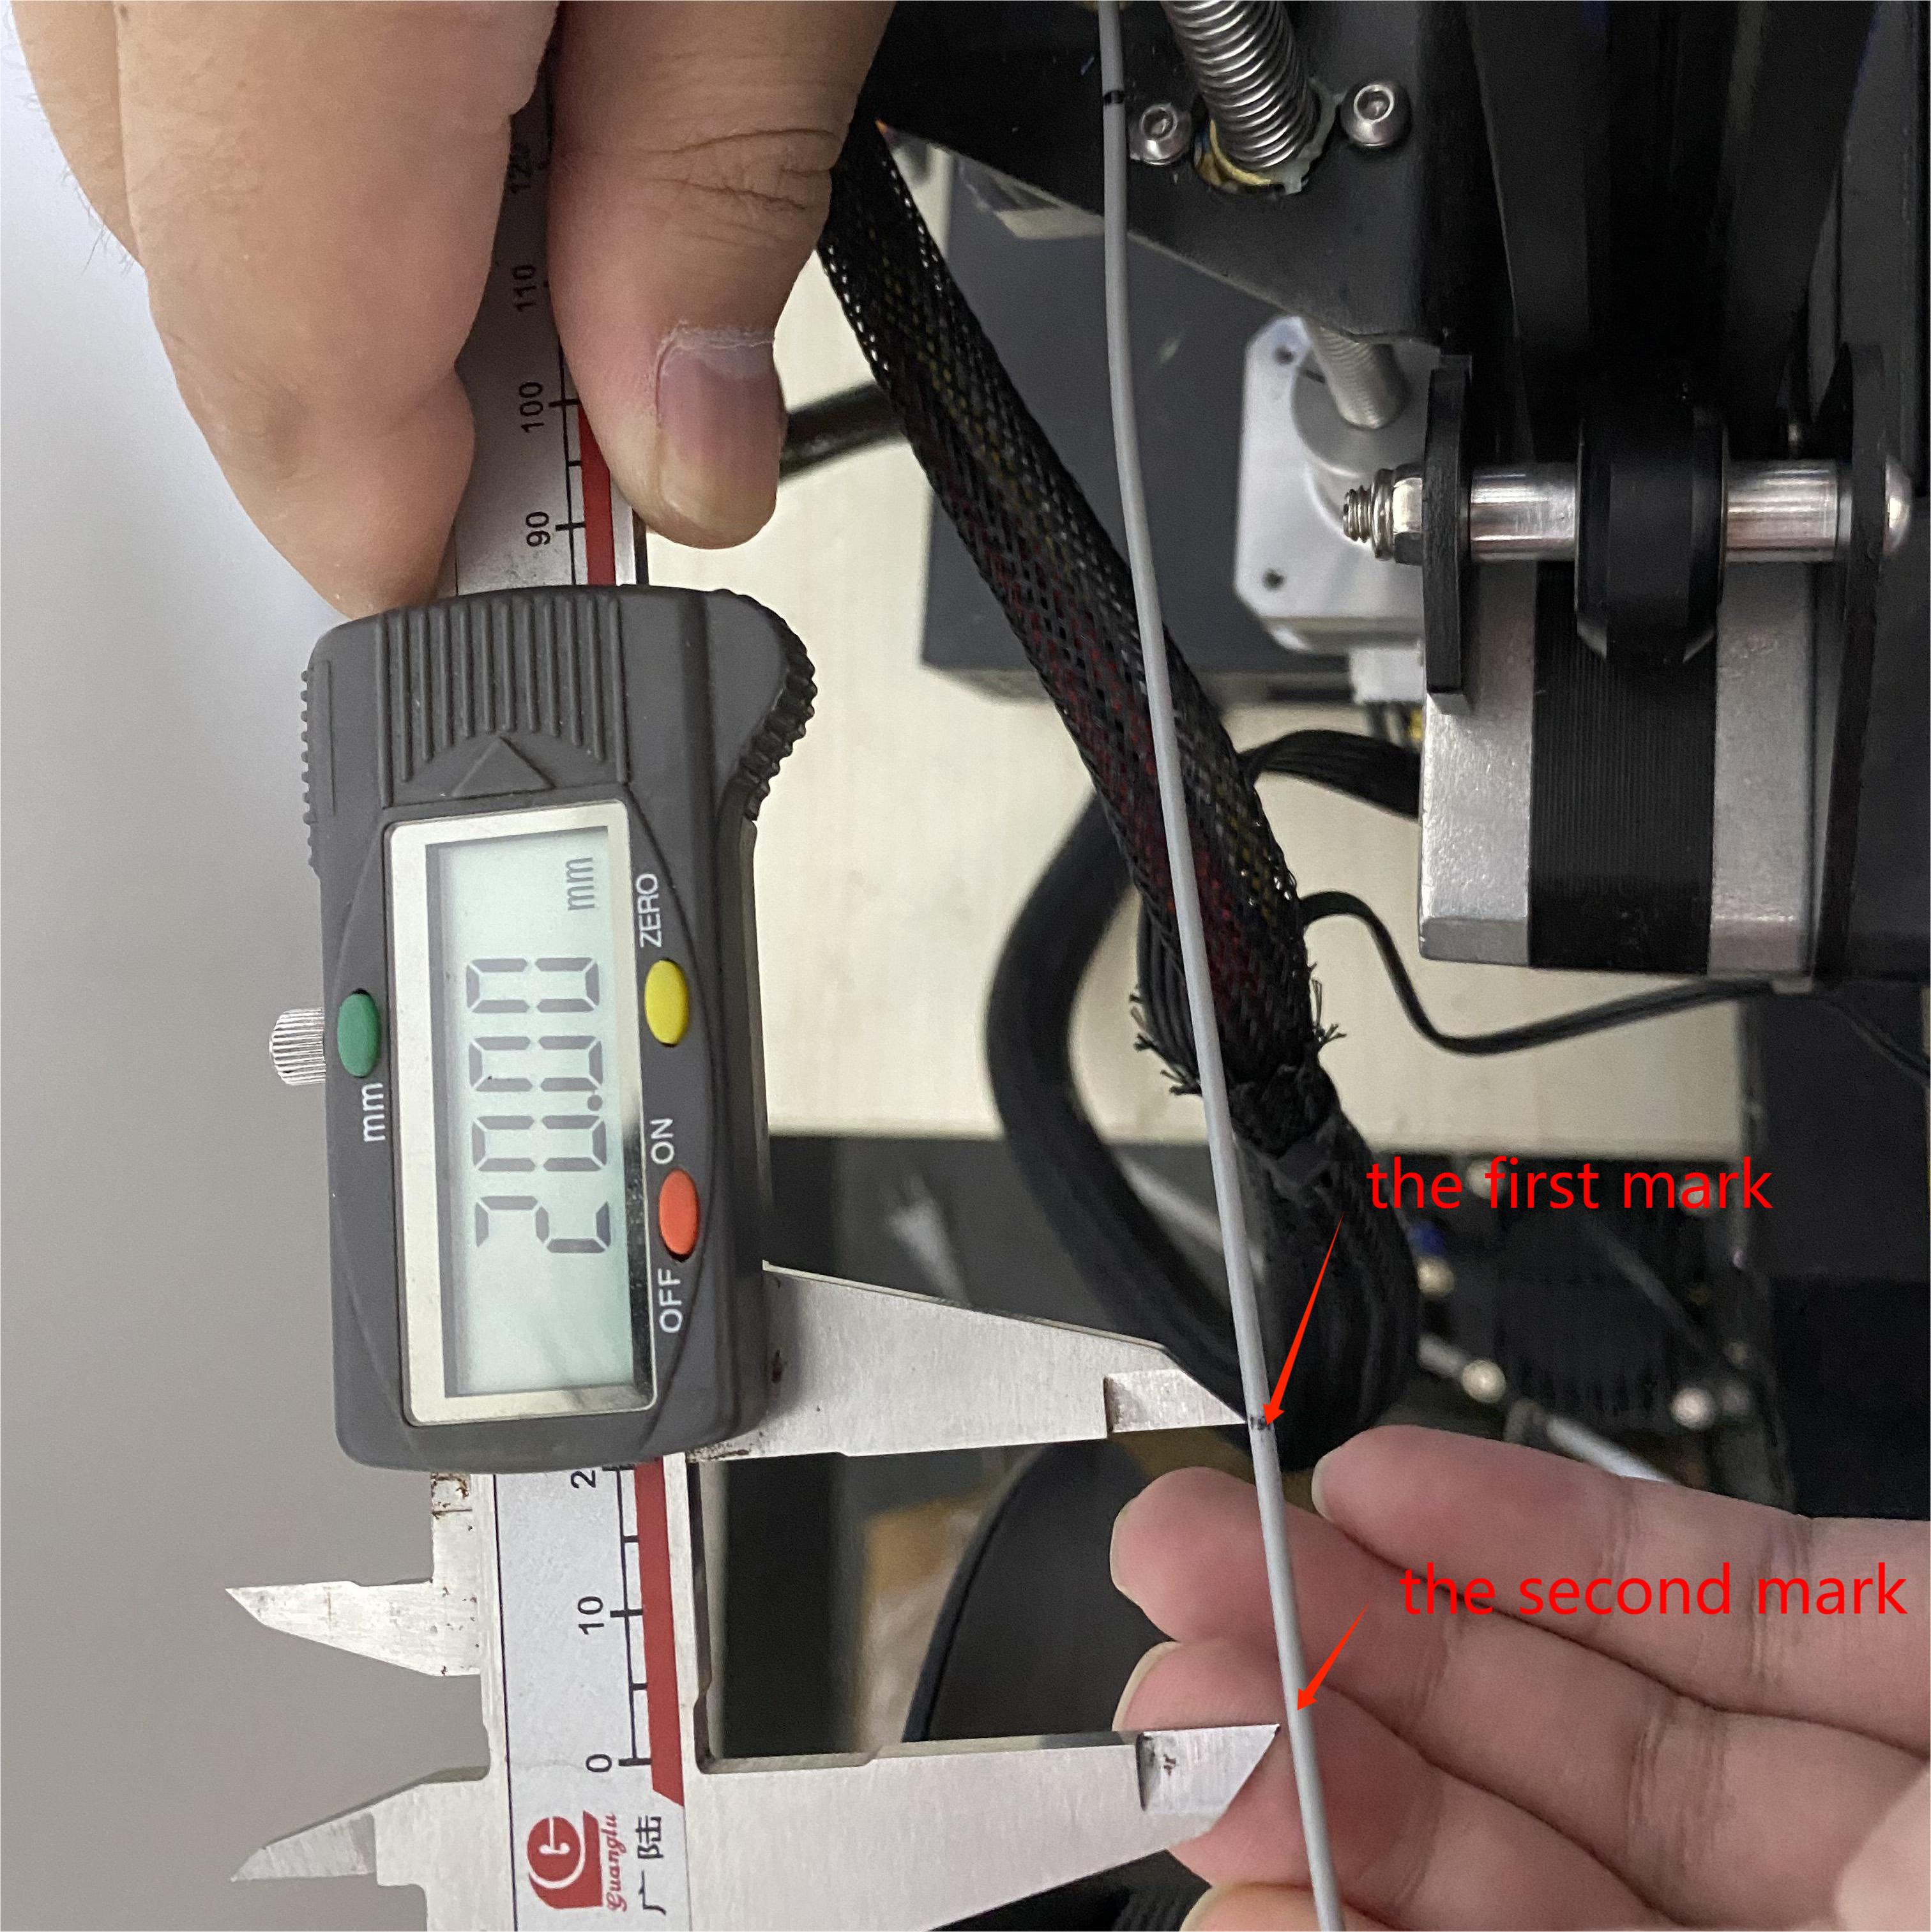
(4)Push the filament to the start point, then operate the e-axis motor to extrude a 100mm length of the filament. (motion > move axis > extruder > move 10mm > set 100.0)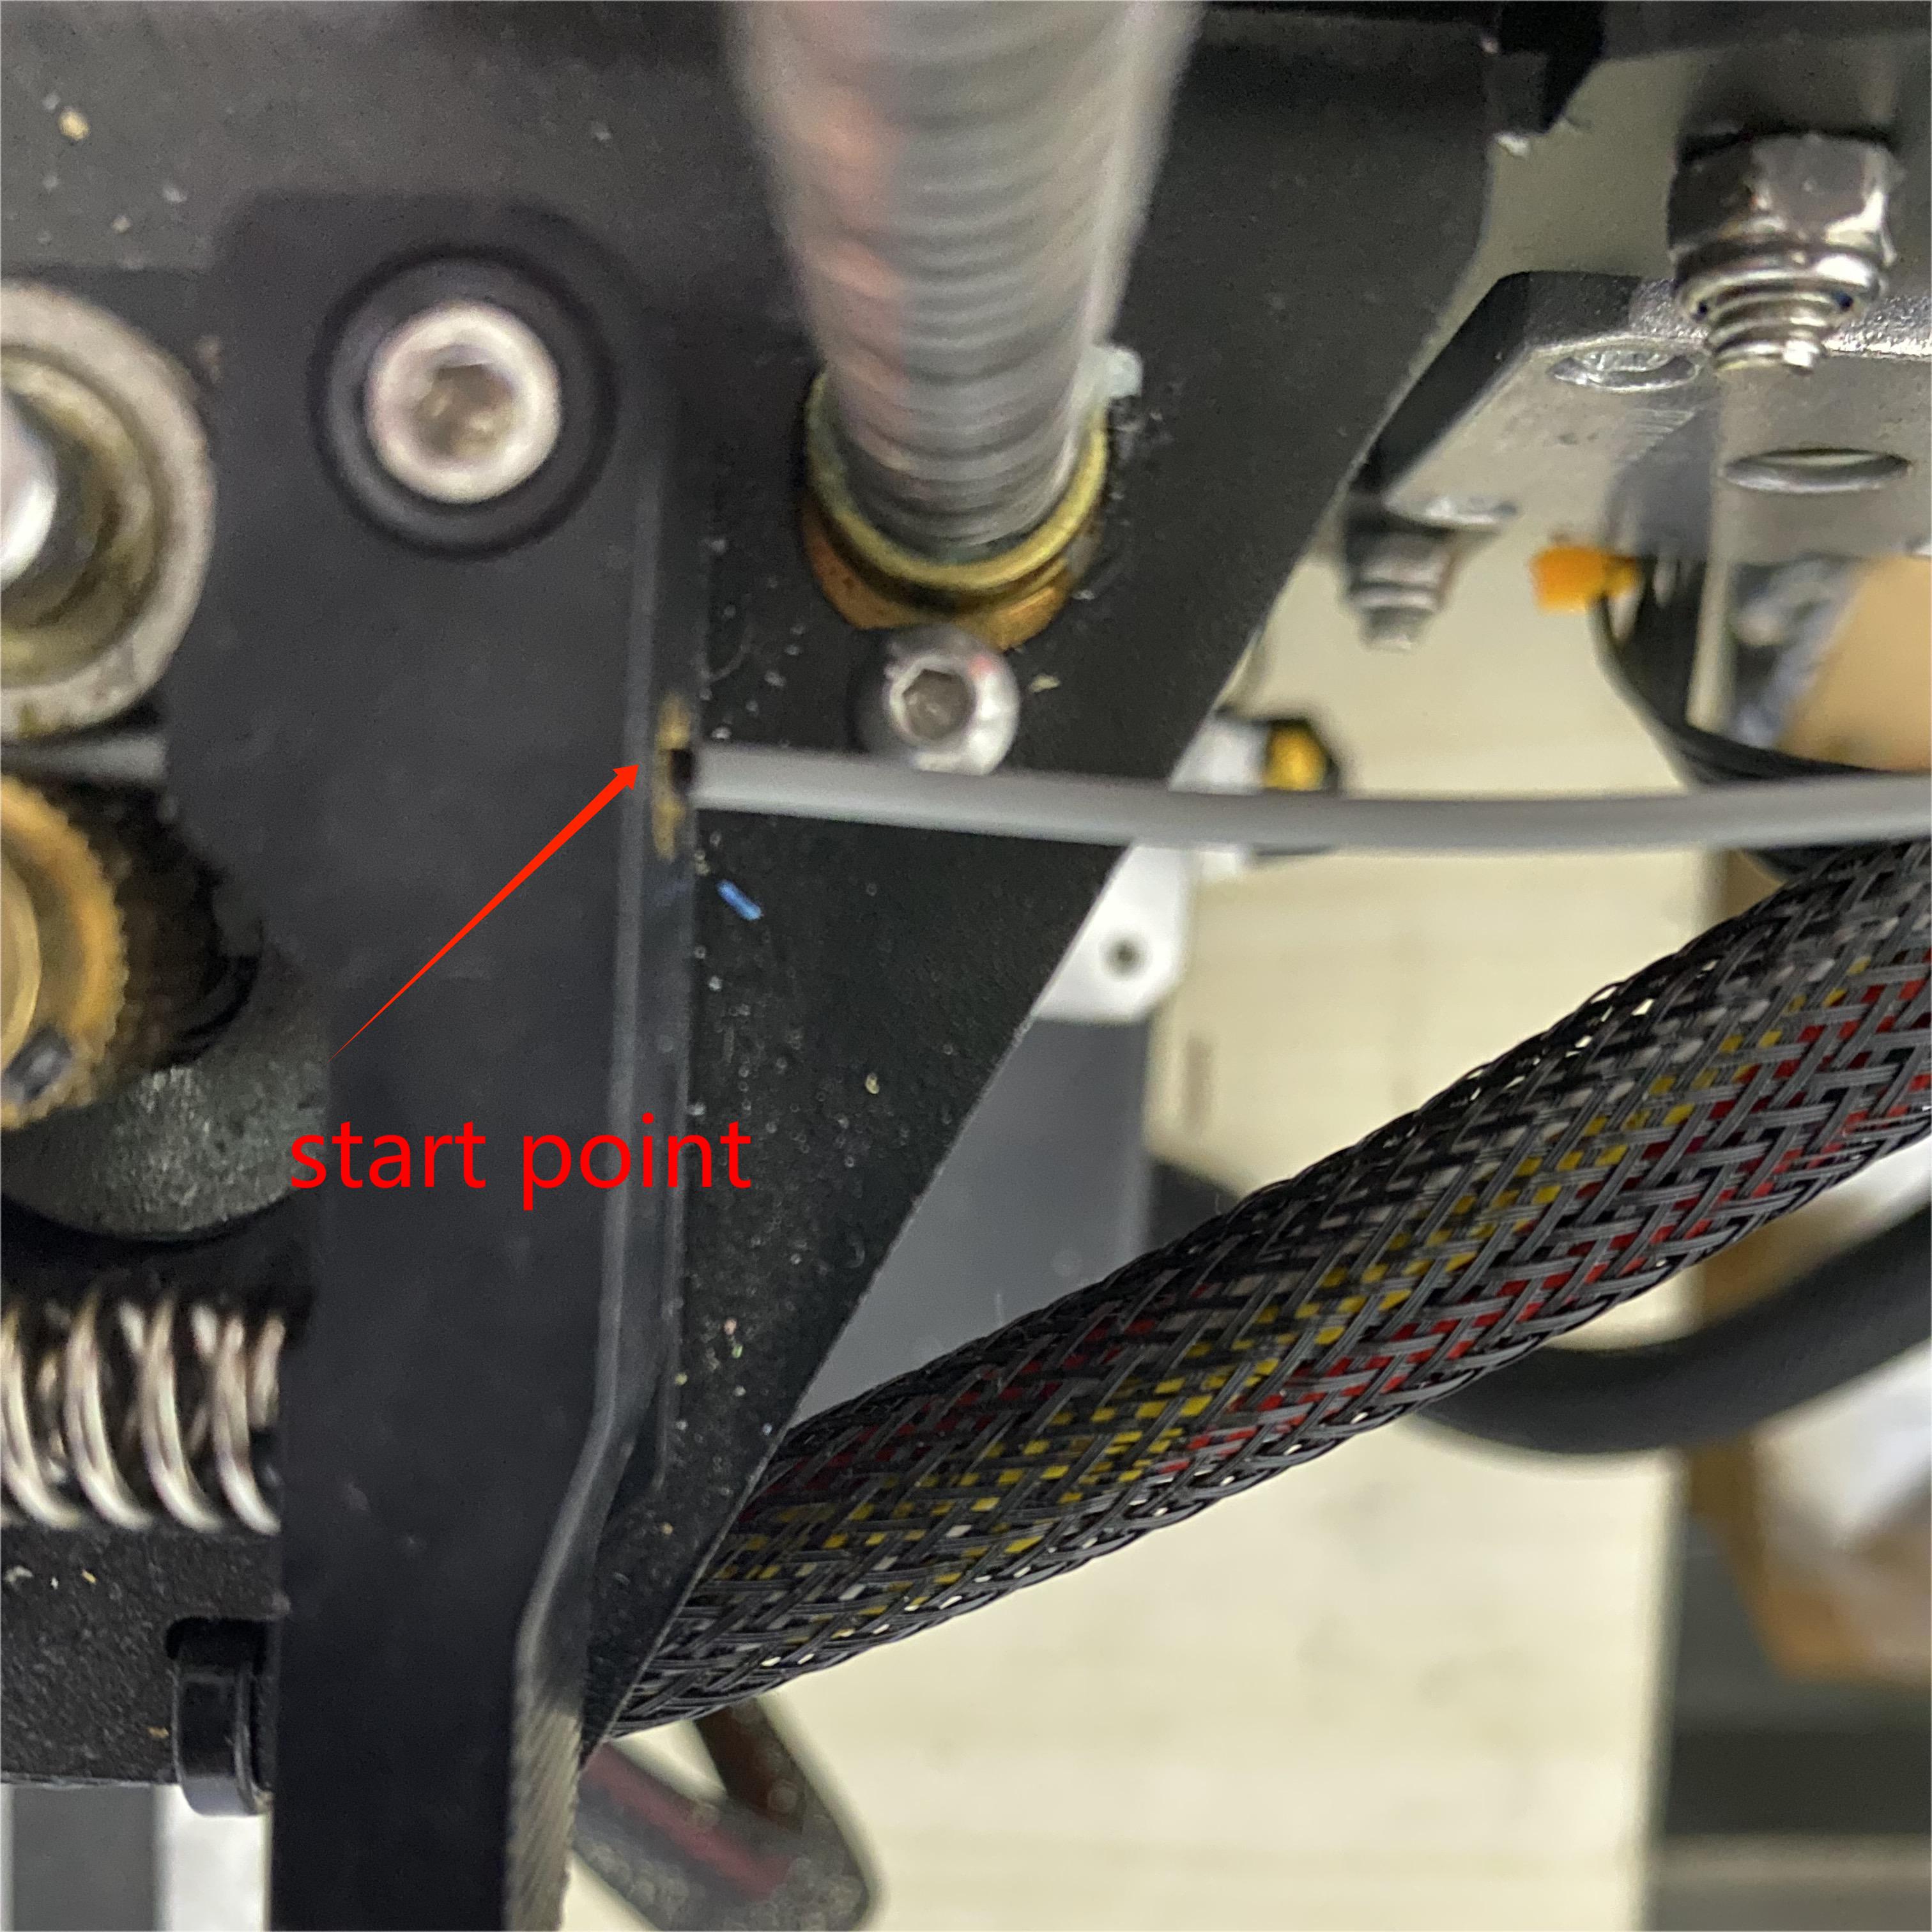
(5)After the extrusion is completed, record the “distance between the entrance of the extruder and the first mark”(D1). If the first mark is invisible due to over-extrusion, calculate the D1 according to the “distance between the entrance of the extruder and the second mark”(D2) using this function: D1 = D2 - 20mm
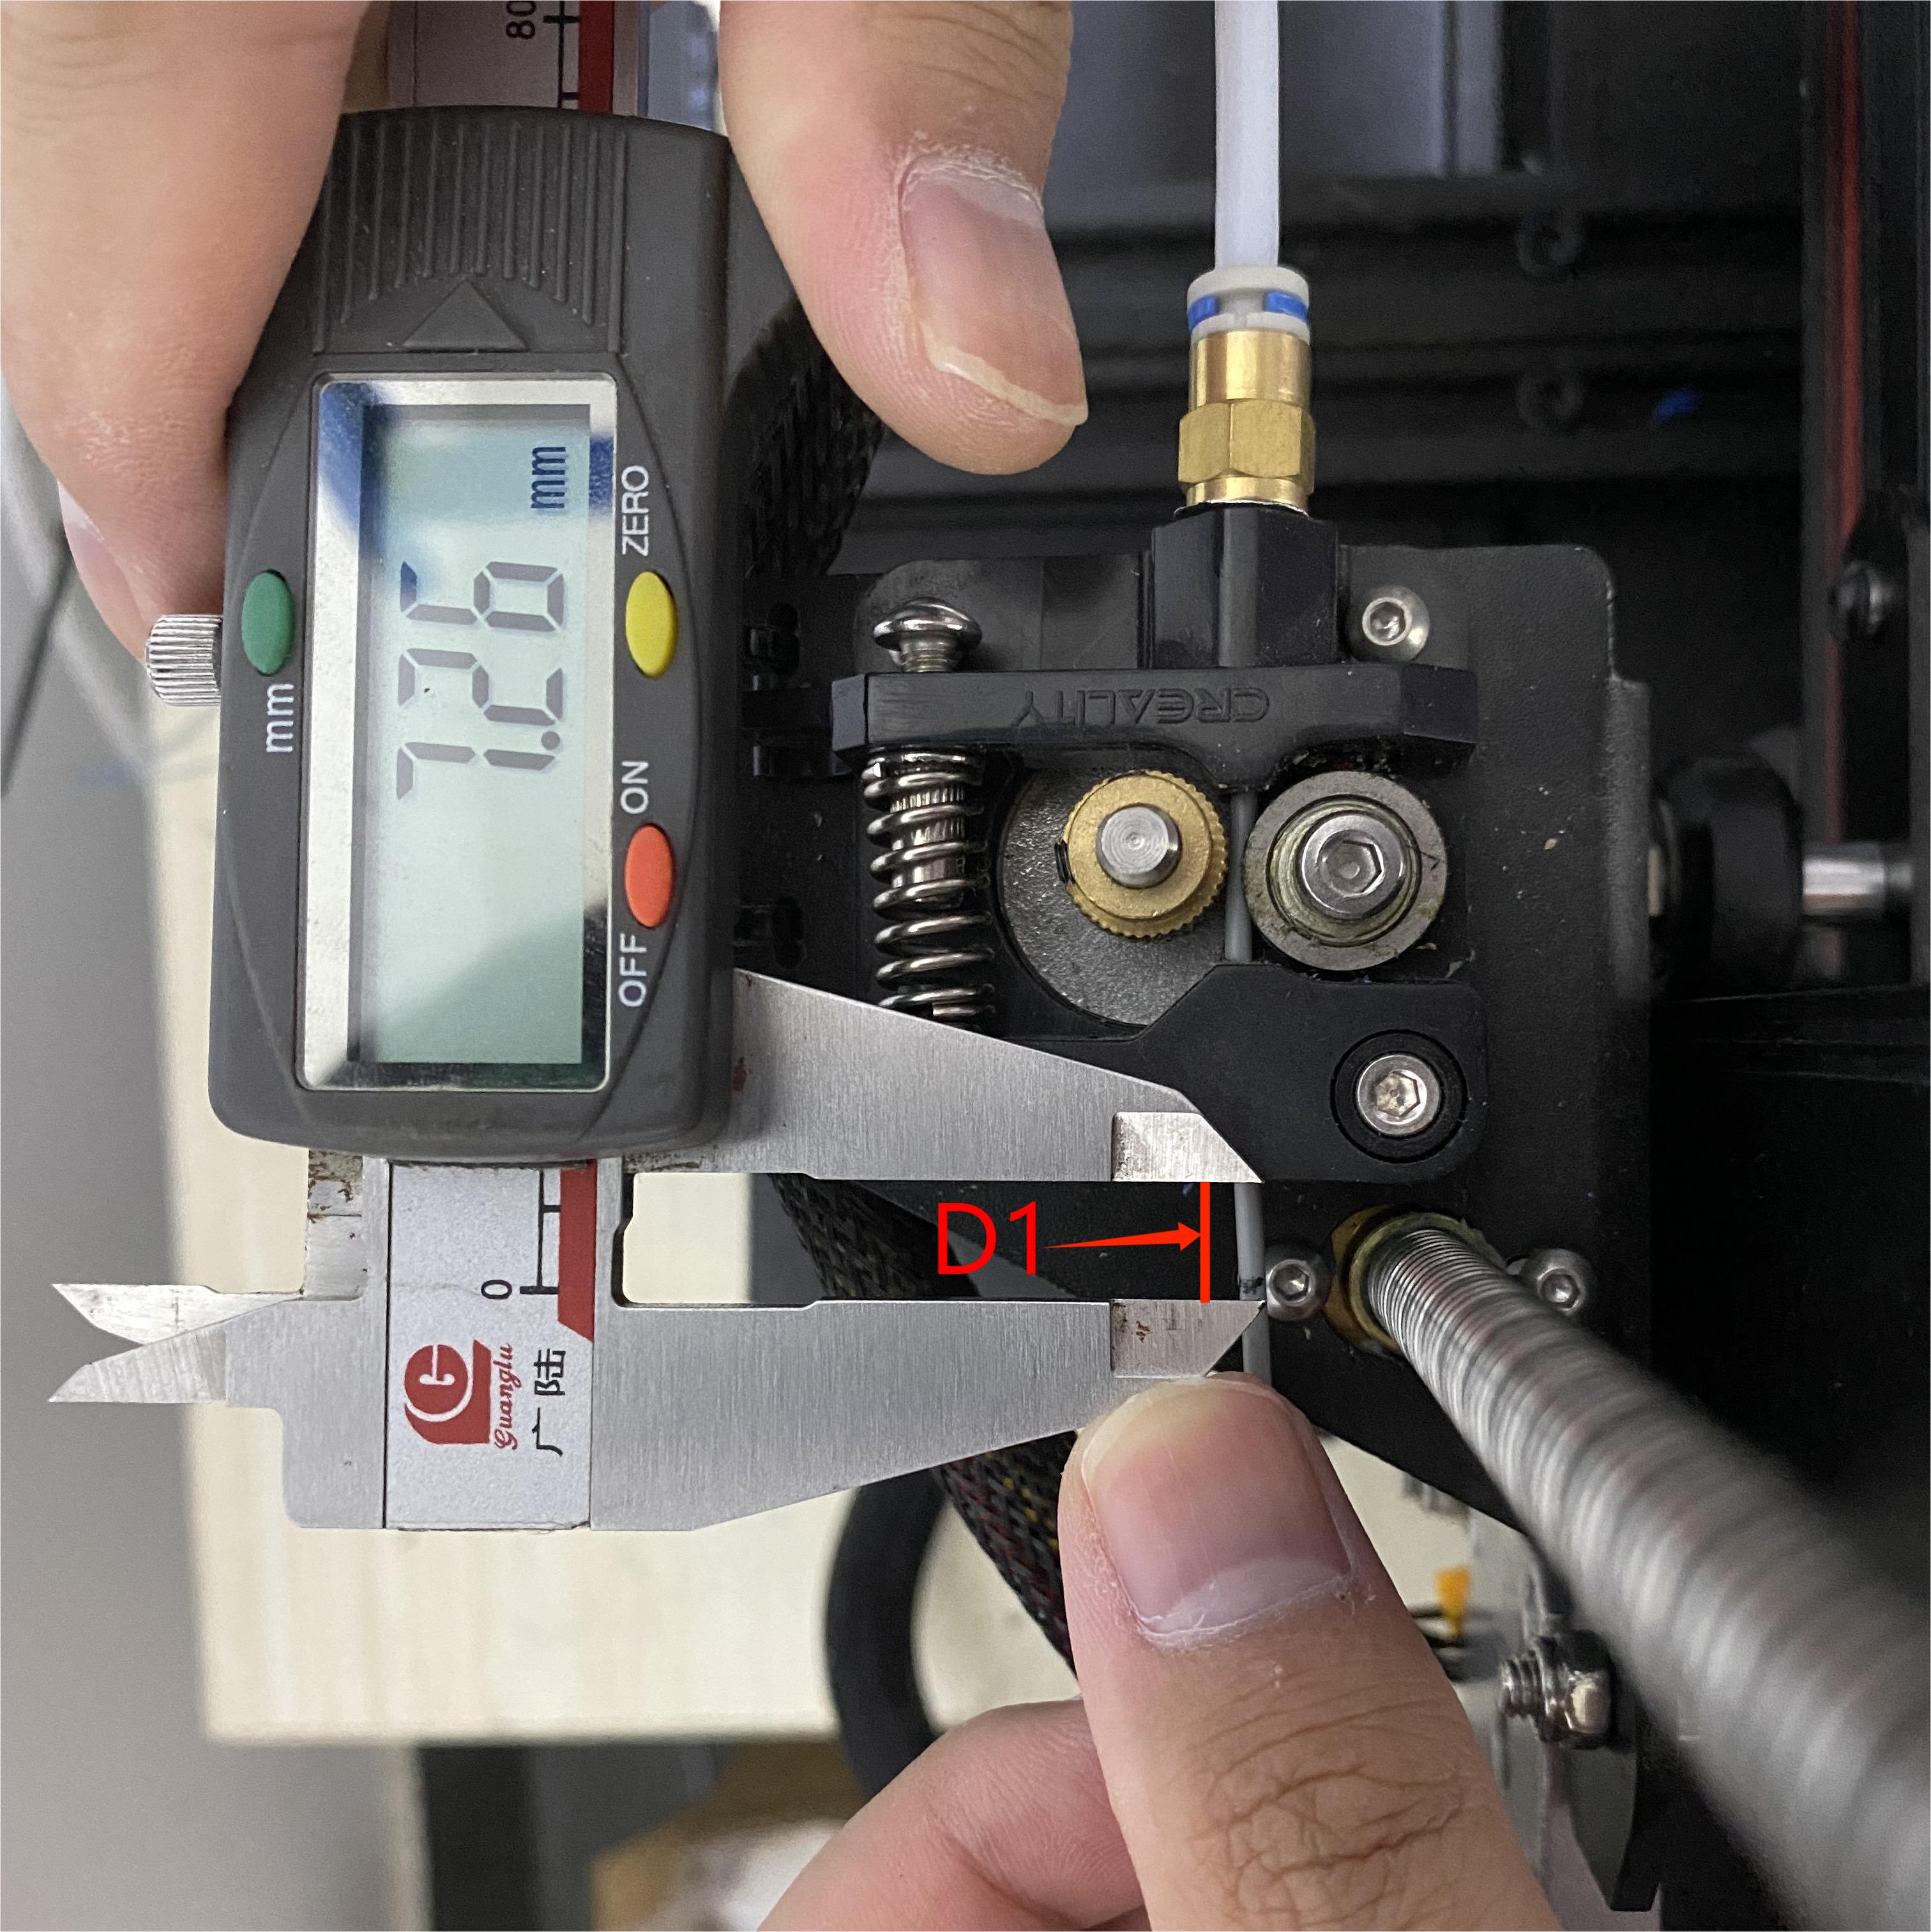
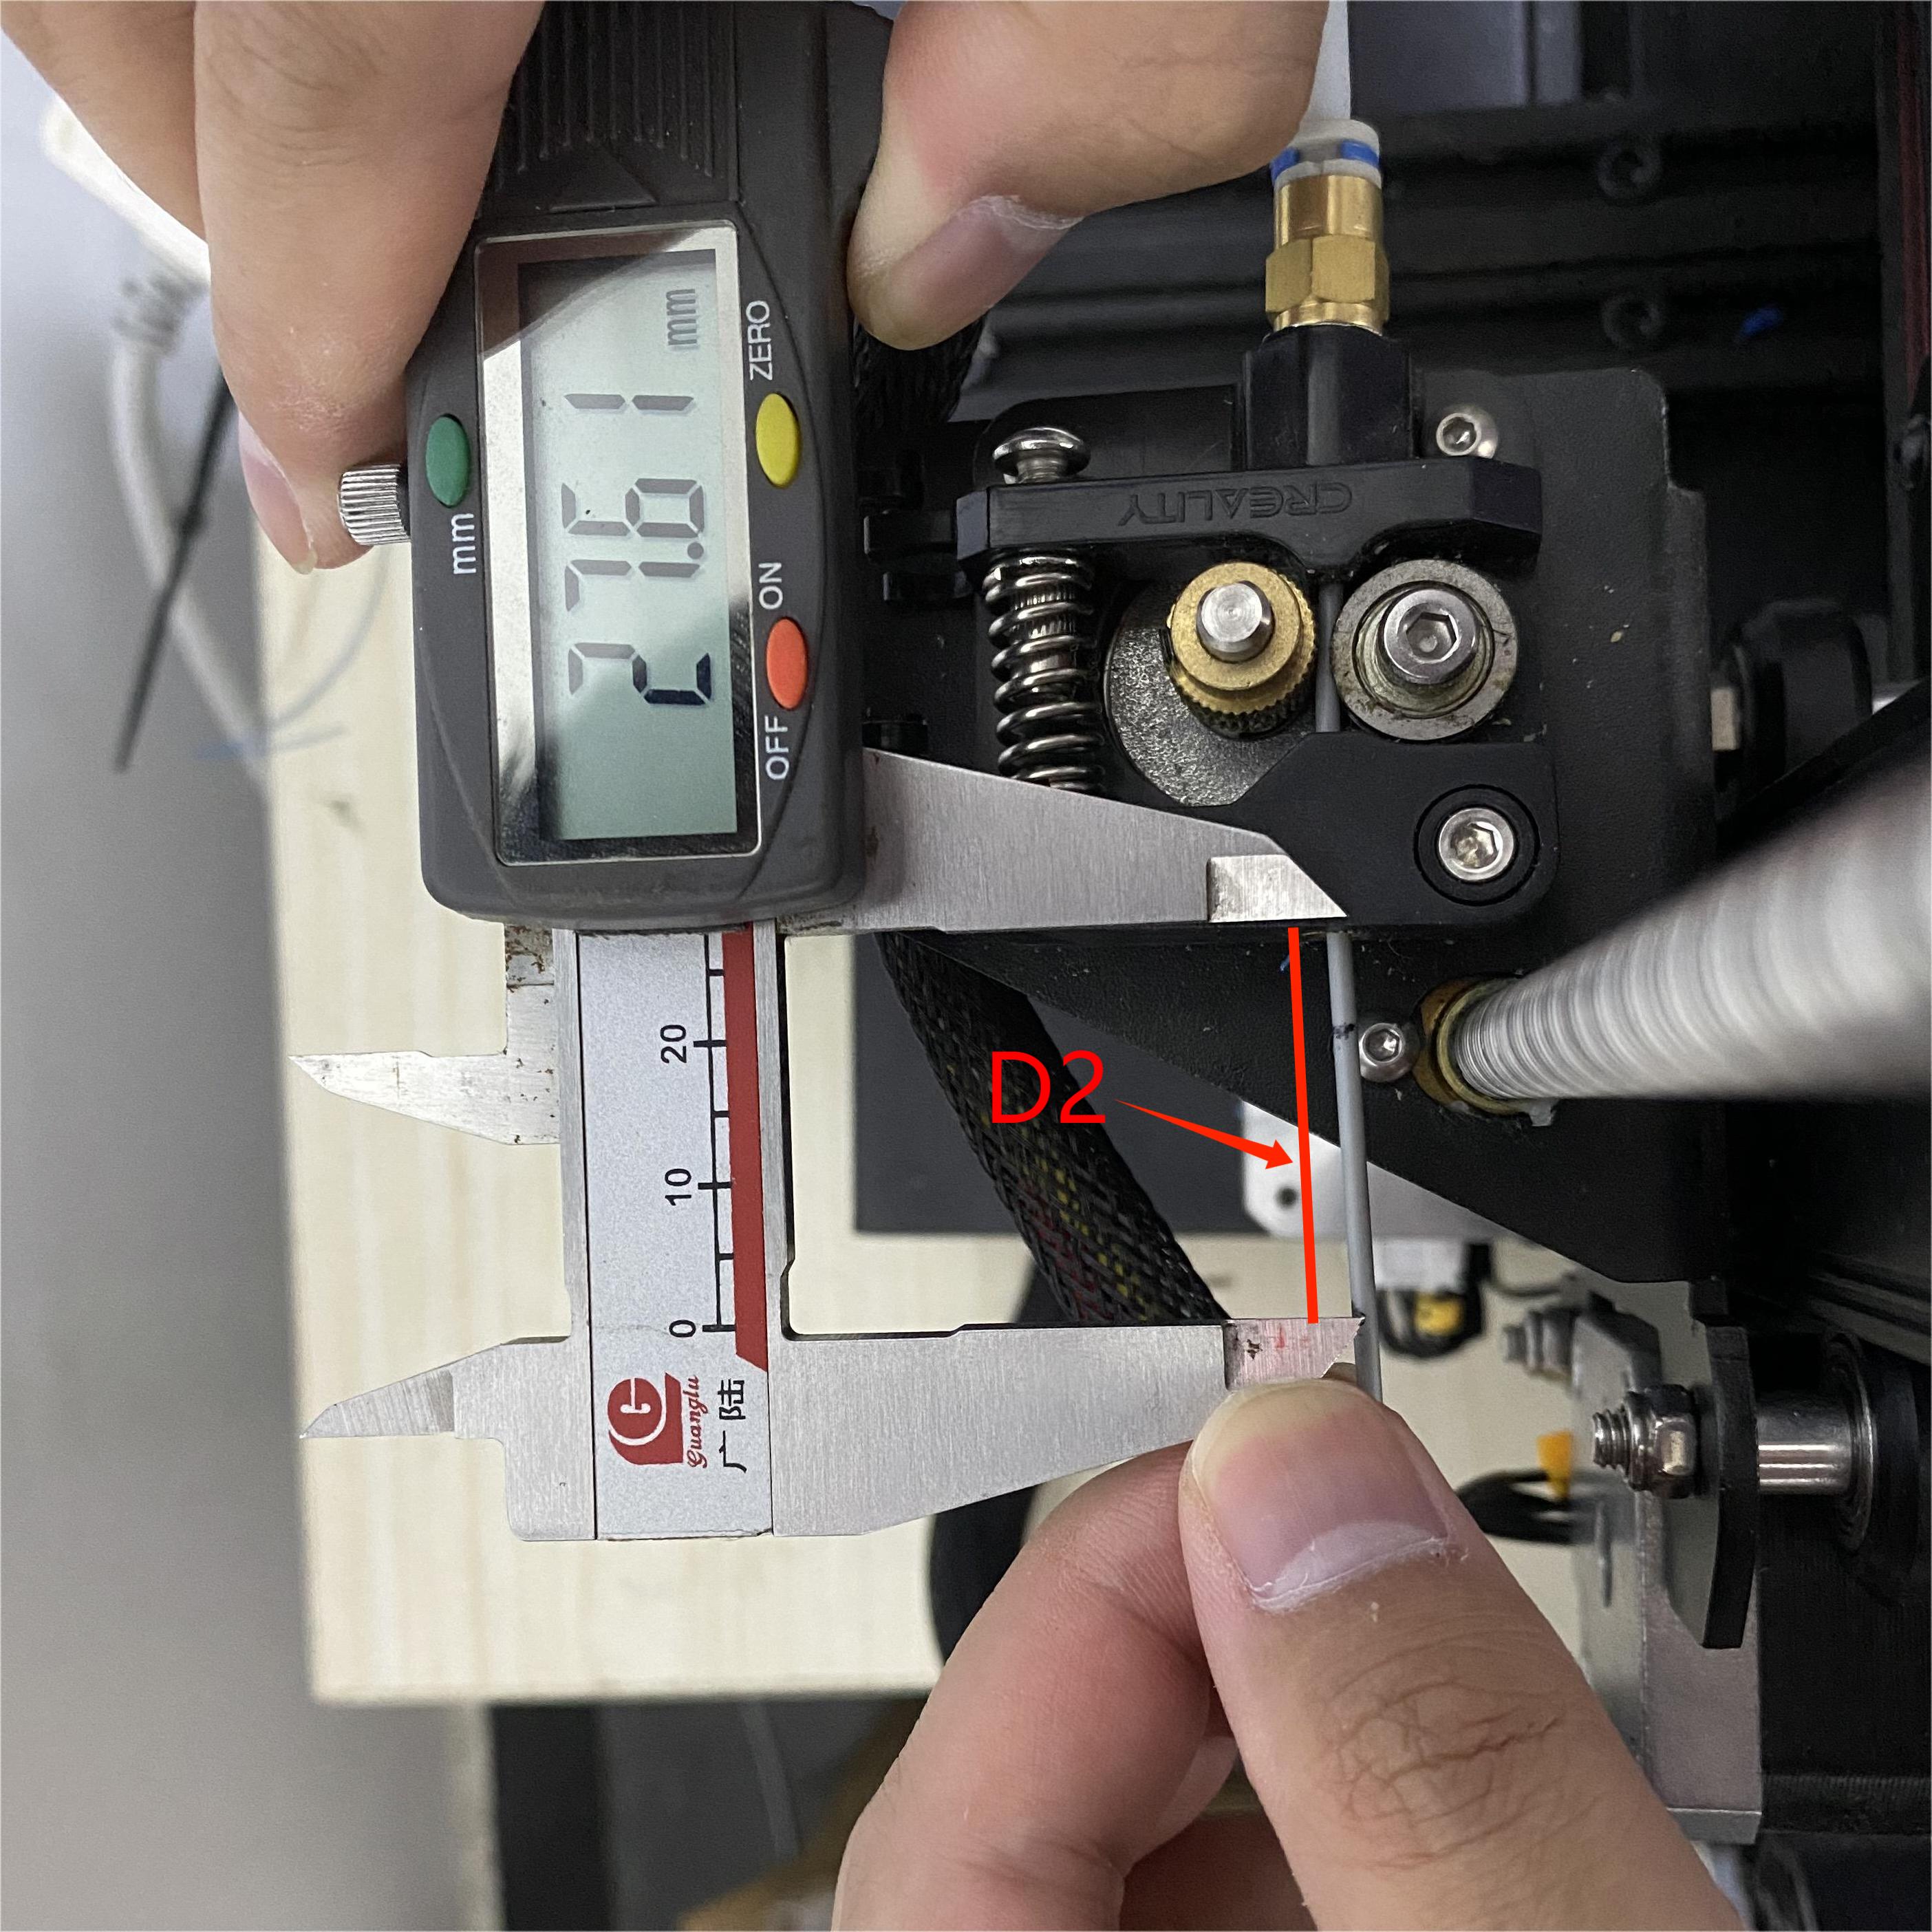
(6) Repeat the above operation several times to obtain more accurate results.
(7) Fill in the test results as follow. (the difference between D1 and D2 may not equal 20mm due to deviation)
|
Distance to 1st mark(D1) |
Distance to 2nd mark(D2) |
|
|
1 |
7.26mm |
27.61mm |
|
2 |
6.38mm |
26.78mm |
|
3 |
6.97mm |
27.17mm |
|
Average(≈) |
6.87mm |
27.18mm |
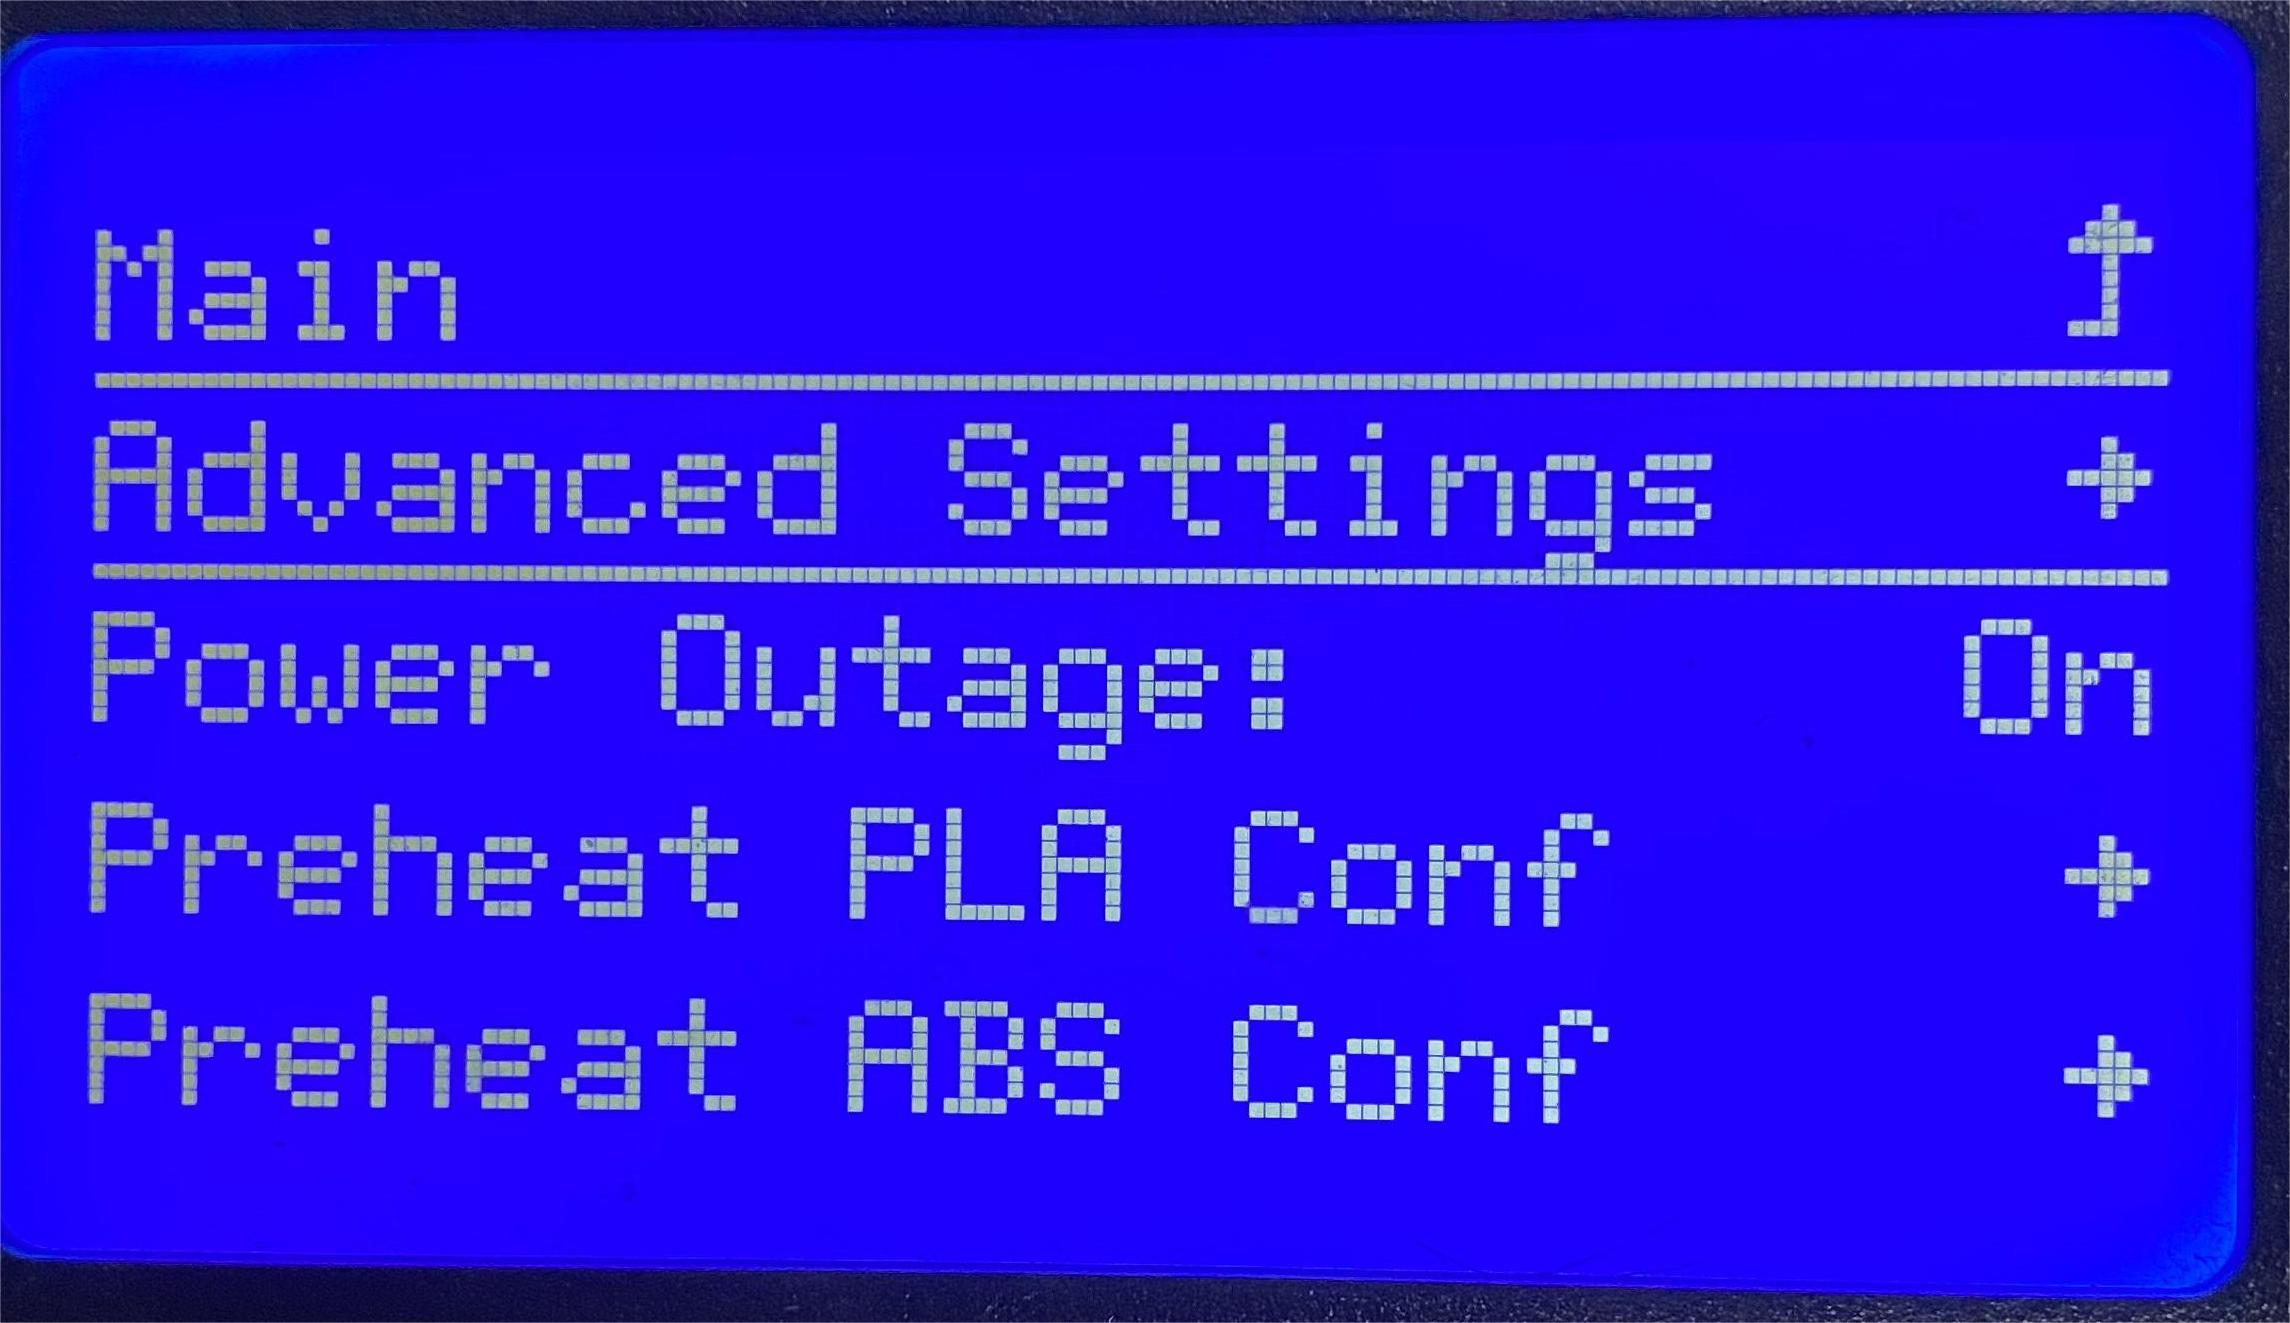
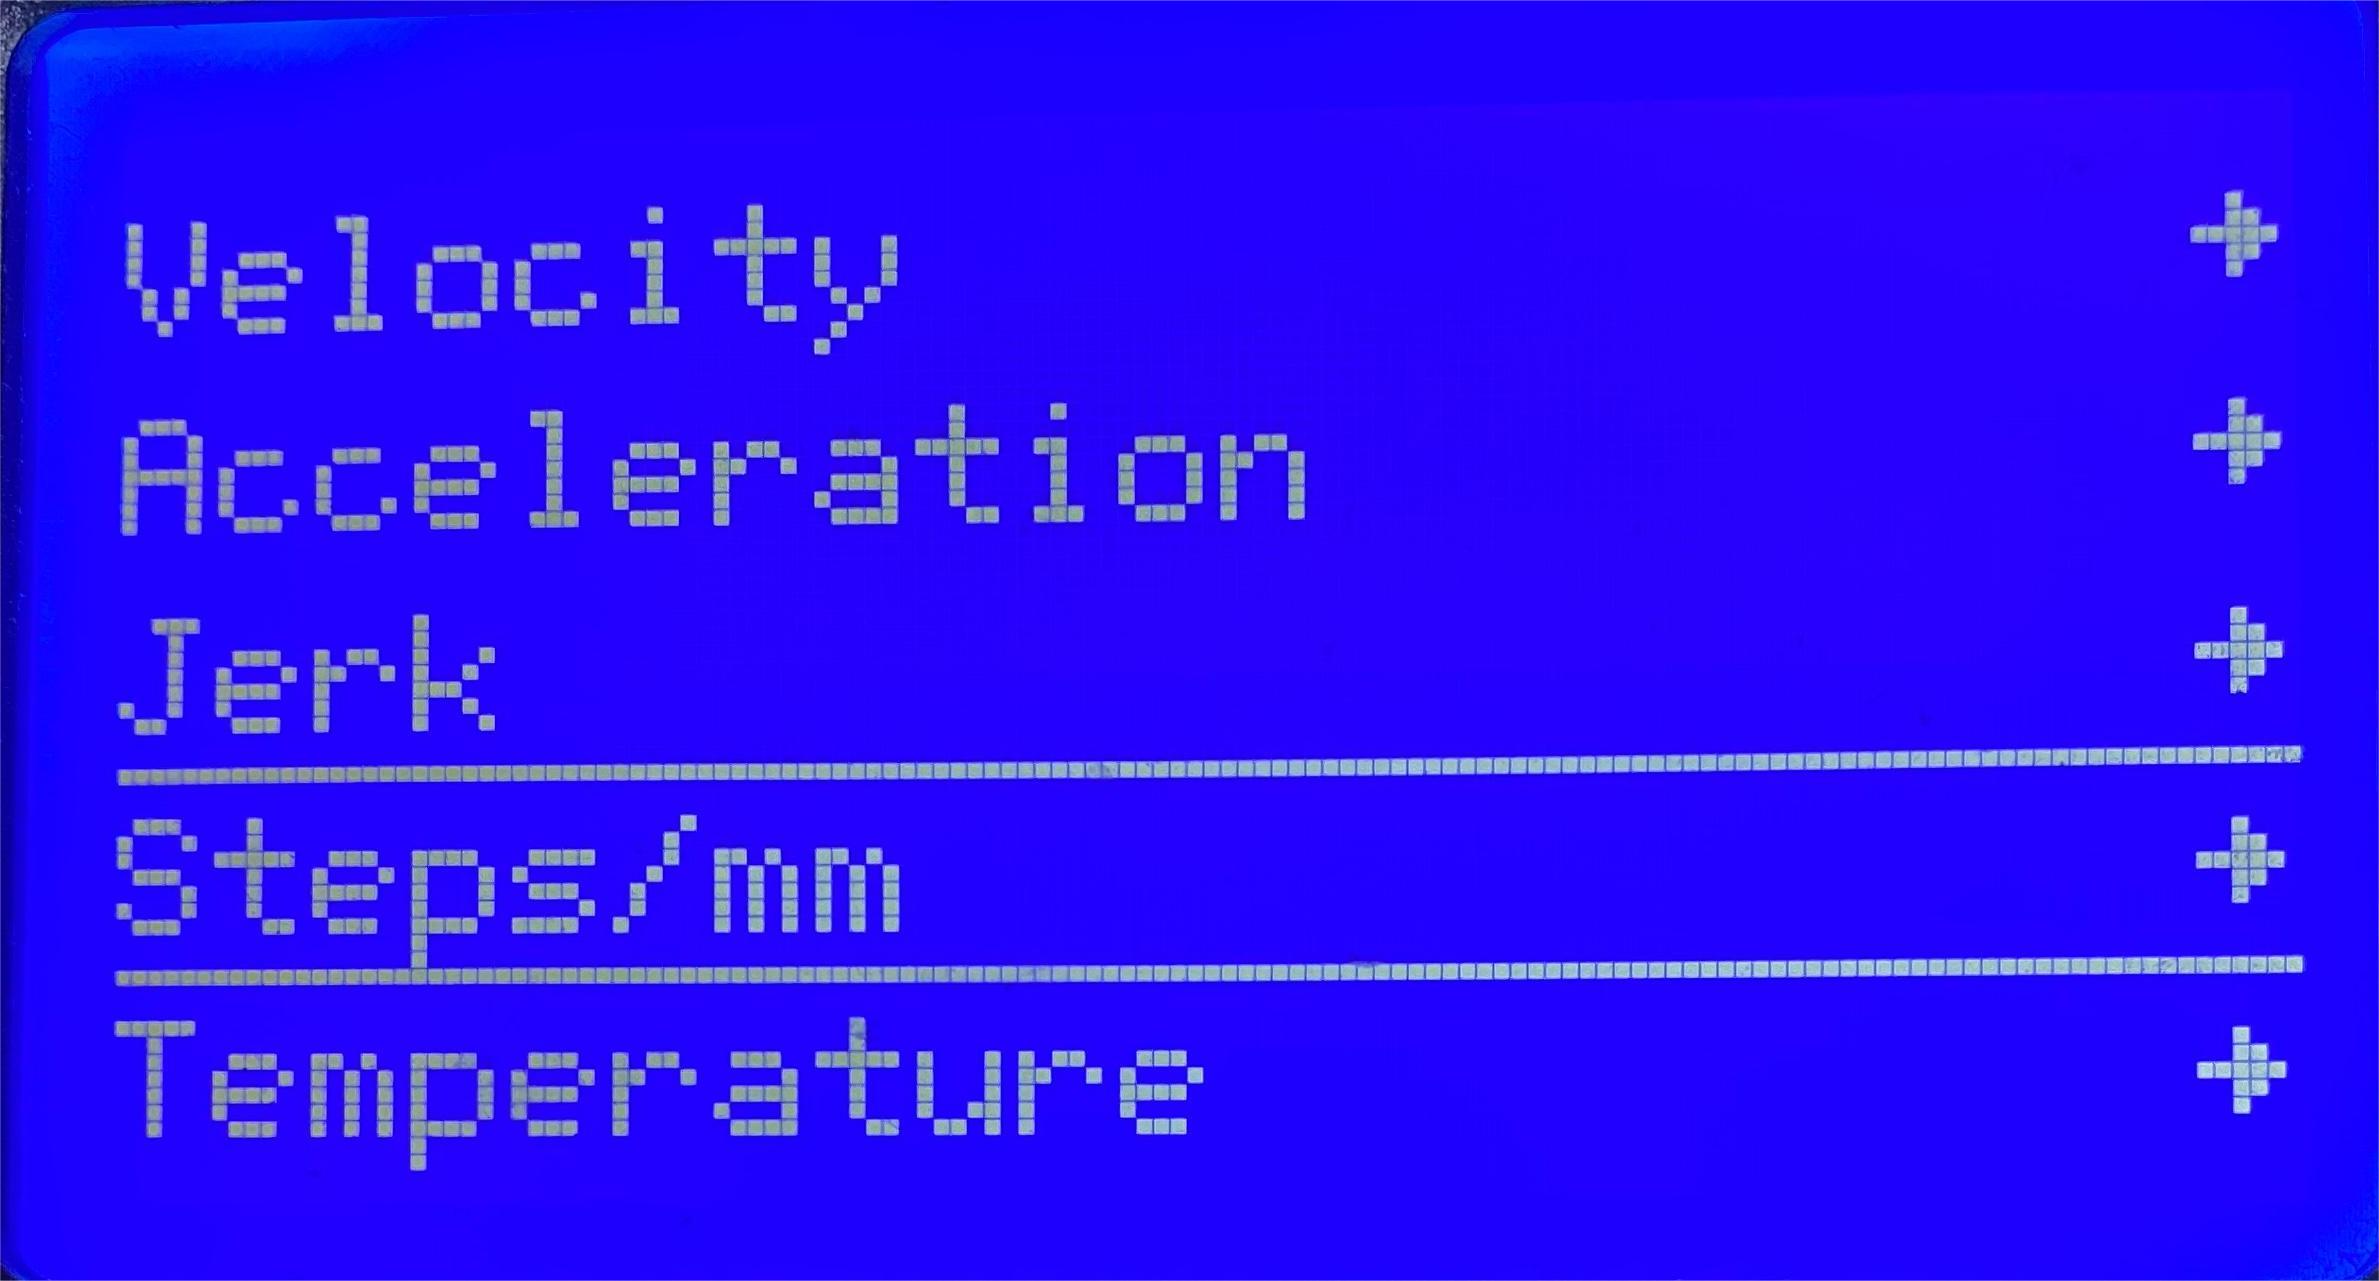
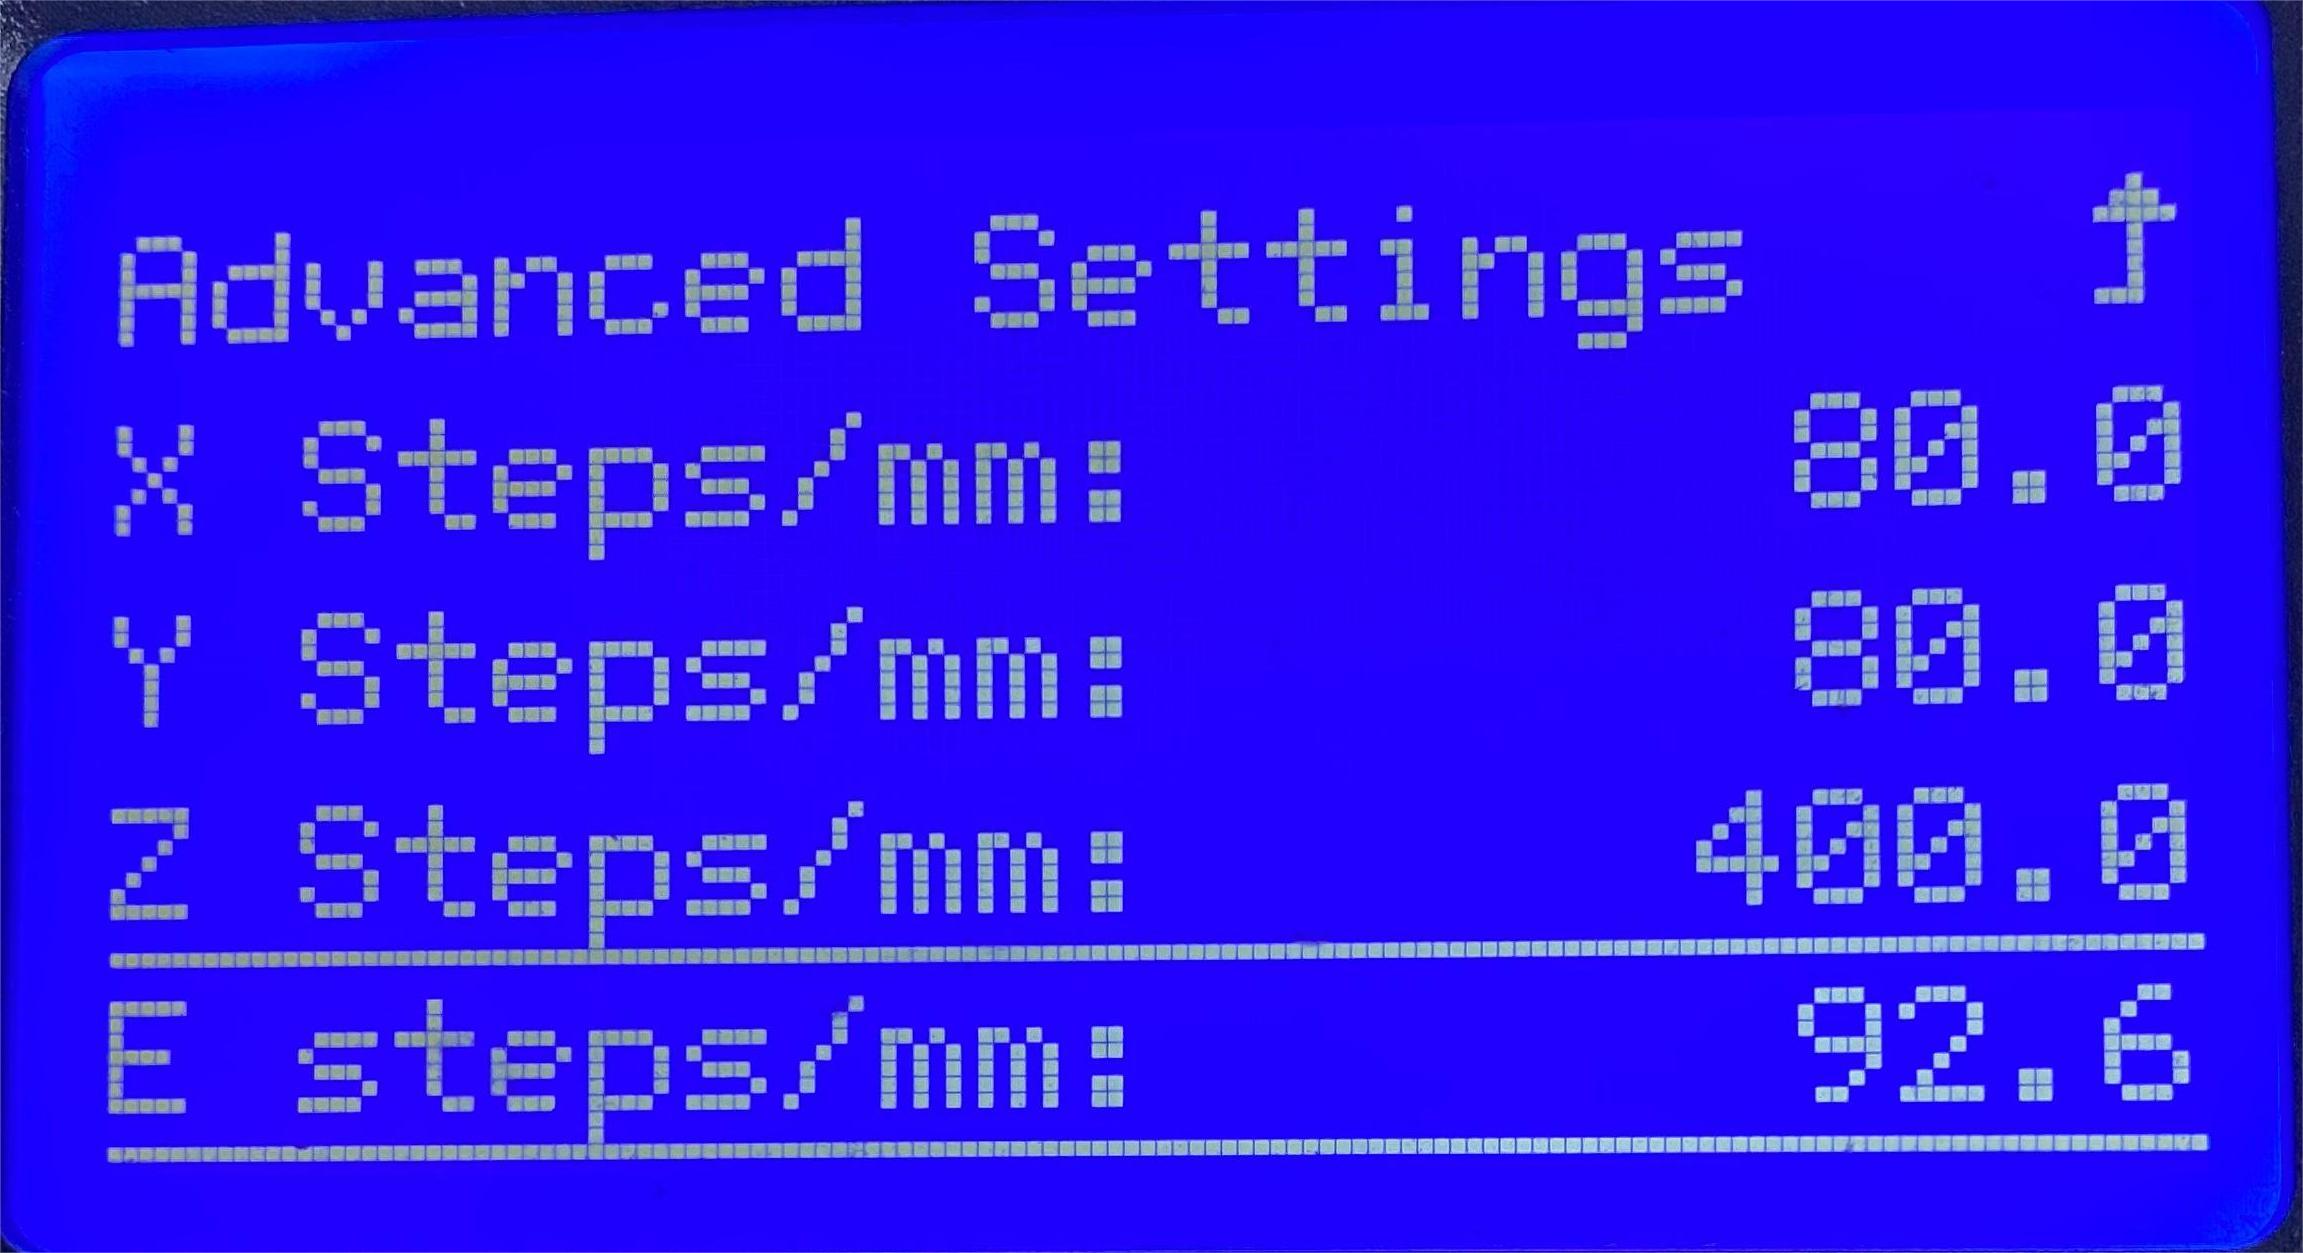
(8) Find the current E steps/mm setting: Main > Configuration > Advanced Settings > Steps/mm > E steps/mm (demonstrated on Ender-2 Pro)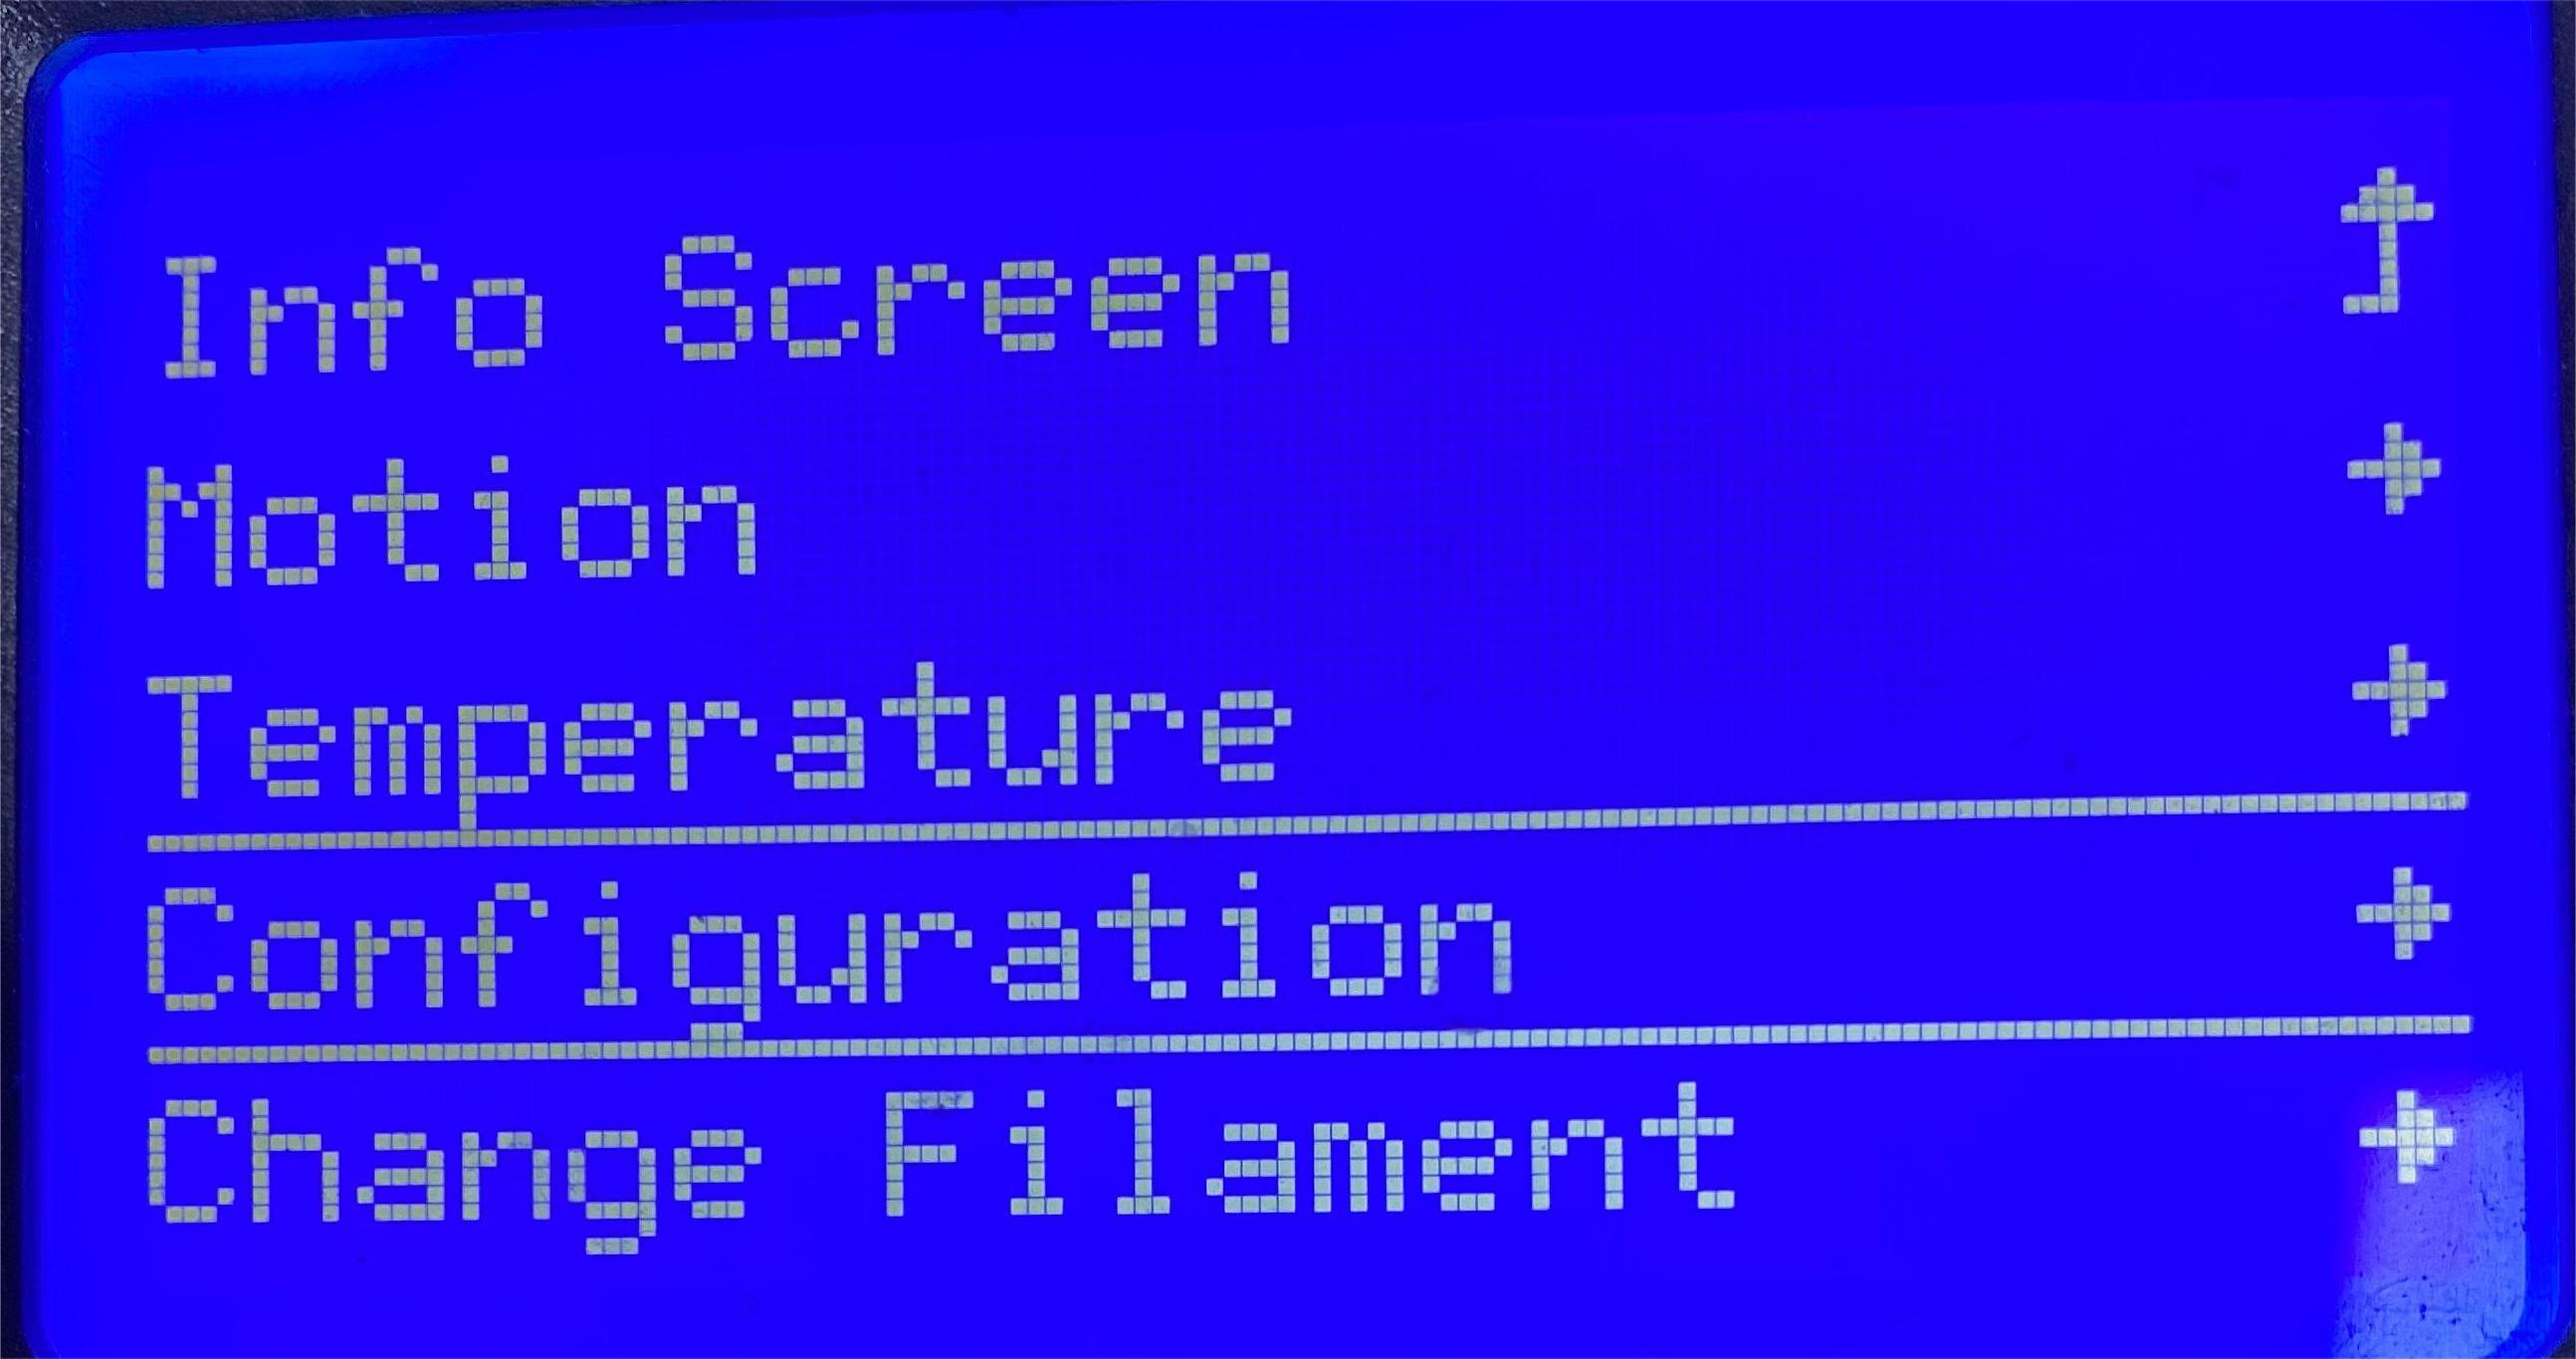
1.3 Calculate the actual extrusion speed
(1)Calculate the ratio of the preset extrusion and the actual extrusion: R=((100mm-avg.D1)/100mm)*100%
Ex: R=((100-(6.87))/100)*100%=93.13%
(2)Calculate the correct E steps/mm: E=E(current)/R
Ex: E(correct)=92.6/93.13%≈99.4
2. Calibrate e-steps on the 3d printer
If you are using a non-touchscreen 3d printer, it most likely has the option to adjust E steps/mm. This setting is to transfer the preset length to the actual steps the E-axis motor should perform. If you have done the E steps/mm calculation in section 1, you just need to go straight to modify the E steps setting on your printer.
Find the E steps setting: Main > Configuration > Advanced Settings > Steps/mm > E steps/mm (demonstrated on Ender-2 Pro)
3. Calibrate e-steps using Pronterface
If you can’t find the E steps/mm setting on their printer, which is usually mounted with a touch-screen, you can modify the setting through any software that can send g-code commands to your 3d printer such as Simplify, Pronterface, Octoprint, etc. The demonstration below uses Pronterface.
(1) Once the 3d printer is connected to your computer, input the command “M503” to make your 3d printer report all runtime-configurable settings (in SRAM) to Pronterface. Find the current E steps/mm and calculate the correct E steps/mm(section 1.3).

*Ex: Current E steps/mm in this picture is 415.
(2) Input the correct E steps/mm using the command “M92” in the format as “M92 Exx.xx”

*Ex: Input “M92 E100.00” to modify the E steps/mm to 100.
(3) Check the current E steps/mm to make sure it has been corrected using “M503”

*Ex: E steps/mm been modified to 100.
(4) Save the modification using the command “M500”

4. Calibrate extrusion by adjusting the flow rate
One quick method to control the extrusion amount is by adjusting the flow rate in the slicer or the printer configuration. The reason why I didn’t recommend this method in the first place is changing the flow rate won’t fix the faulty E steps setting which will continue to exist in your future prints.
I assume you have followed the steps in Section 1.2 and confirmed the current flow rate on your printer.

4.1 Calculate the flow rate ratio.
(1)Calculate the ratio of the preset extrusion and the actual extrusion: R=((100mm-avg.D1)/100mm)*100%
Ex: R=((100-(6.87))/100)*100%=93.13%
(2)Calculate the correct E steps/mm: FR=FR(current)/R
Ex: E(correct)=92.6/93.13%≈99.4
4.2 Adjusting the flow rate on the printer
There are multiple ways to adjust the flow rate and the easiest one is by twisting the knob on the info page.
4.3 Adjusting the flow rate in the slicer
Also, you can adjust the flow rate through the slicer. You can preset the flow rate in Print setting > Material > Flow.

5. Extruder grinding filament
Did your extruder gear ever “bite” the filament when pushing in? Be aware of the possible under-extrusion it may lead to! There are multiple causes of the grinding issue. The first and most common cause is the gear griped on the same spot of filament for too long due to clogging in the hotend. The second cause is the extruder gear is too tight which makes the gear grips into the filament too deep.
5.1 Unclog the hotend
It is very easy to tell if your nozzle is clogged or not. If you observed missing layers and heard a clicking sound from the extruder, you need to realize the existence of a clogging issue in your hotend. The reason you are hearing the clicking sound is the extruding gear doesn’t have enough strength to push in the filament anymore, due to the clogged hotend. The extruding gear then grinds on the same spot for a while which finally “bites off” a part of the filament and starts idling.
Check out the unclogging guidance below
Why clogging?
Nozzle printing temperature too low
Nozzle too close to the print bed
Nozzle, throat tube, and Teflon tube need to be cleaned
5.2 Loosen the grip of the feeder gear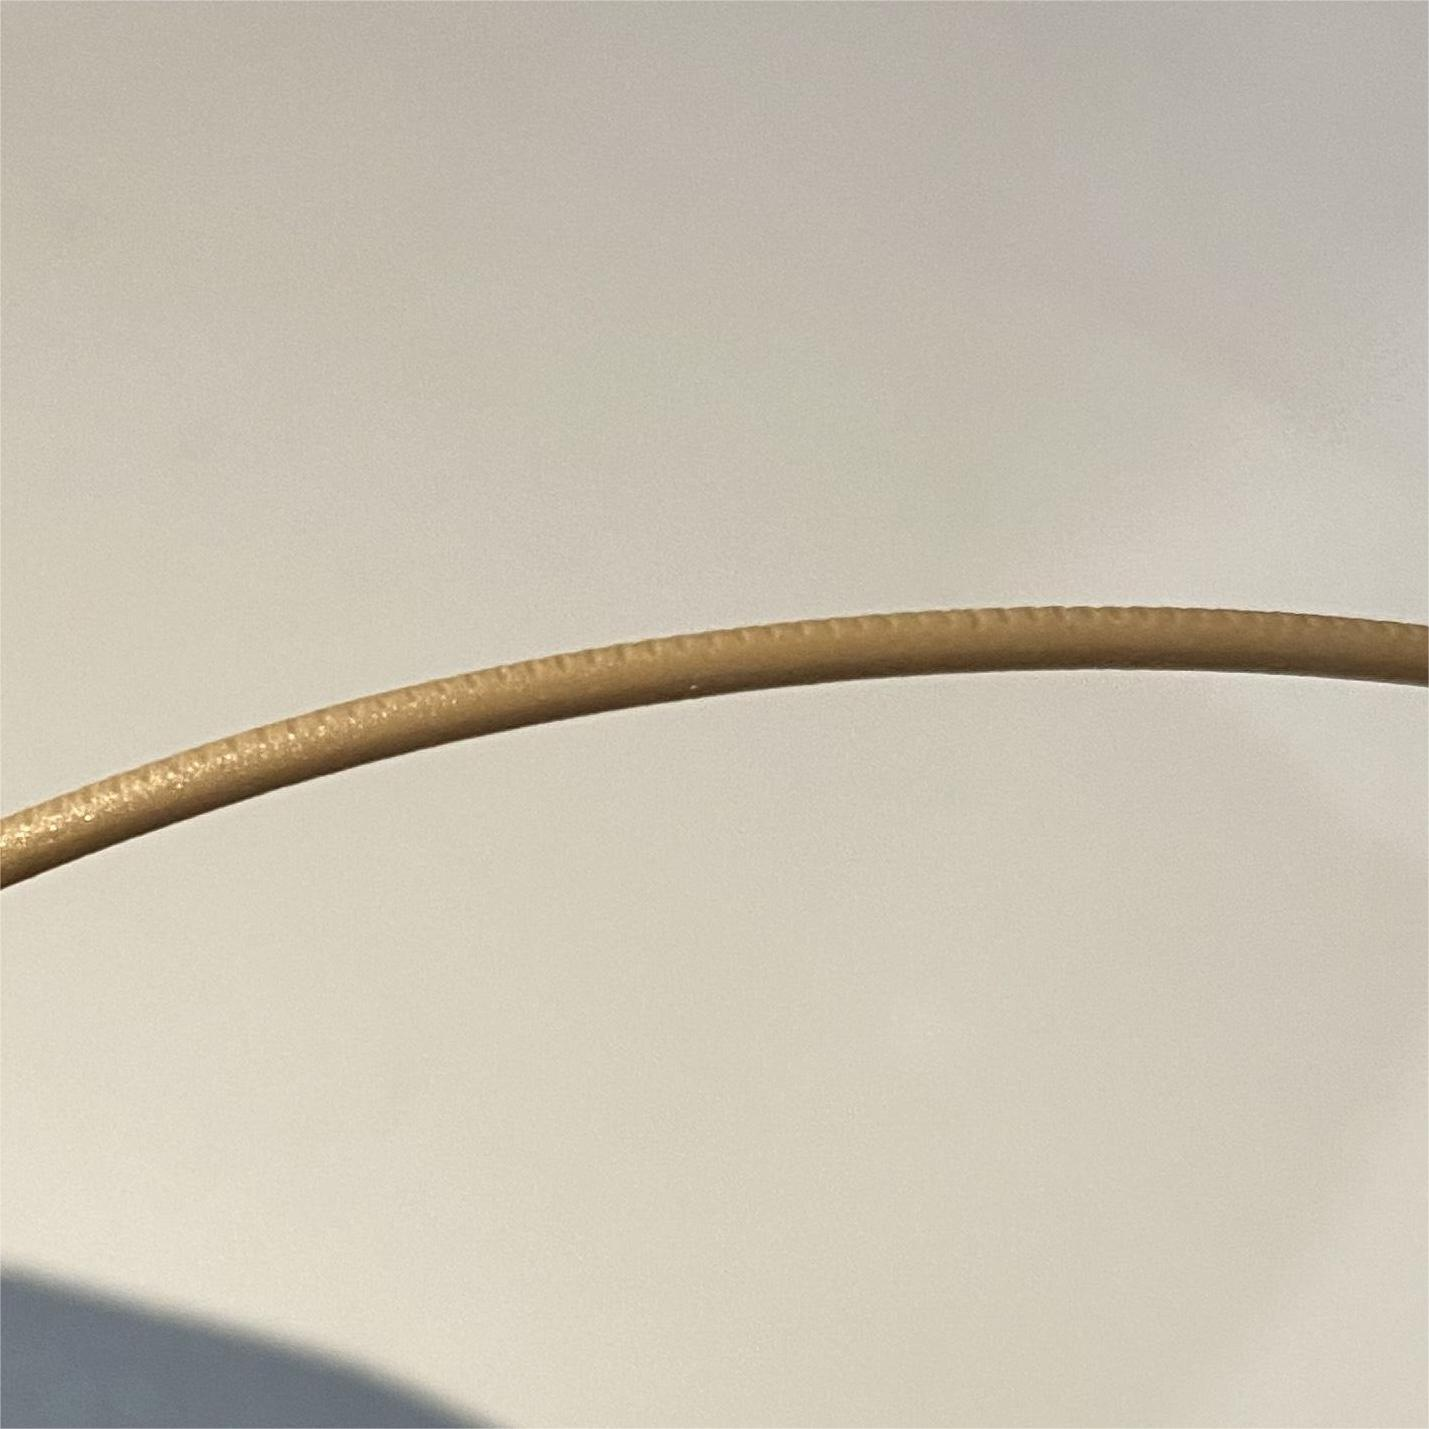
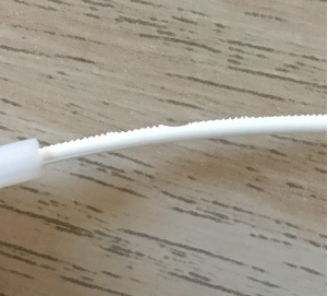
(img source: https://reprap.org/forum/read.php?262,846649)
After making sure the grinding isn’t caused by clogging, you need to check out the tightness of the extruding gear. The picture on left shows how the filament should look being pushed into the Teflon tube by a gentle grip of the extruding gear. The picture on right demonstrates the case when the grip is way stronger than it needed to be. Although the grinding looks bad, you can easily fix it by adjusting the spring tensioner to loosen the grip.
6. Calibrate printing temperature
Inappropriate printing temperature can cause over/under extrusion by melting too many/fewer filaments than the preset flow. Also, too high nozzle temperature may melt too many filaments that are stuck at heat break, and too low nozzle temperature makes the hotend fail to melt all filament that’s fed in. They both lead to clogging.
The best printing temperature isn’t written on the spool. In most cases, you are given a wide range of printing temperatures that can make filament melt but is not hot enough to be degraded. And that is nowhere close to the best printing temperature.
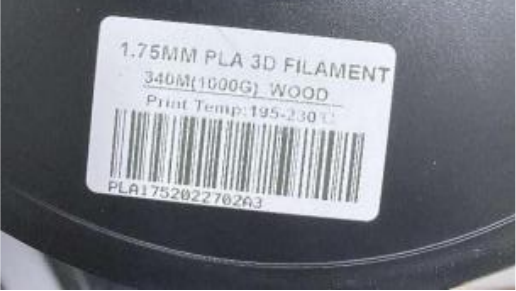
In order to calibrate for the best printing temperature, you will need to:
(1) Open Cura, click in the marketplace, then download calibration shapes.


(2) Find “Add a PLA Temp Tower” in“Part for calibration”

(3) Find modify G-code in post-processing, and select TempFan tower.


(4) Confirm if the default setting contains demanded temperature range

(5) Slice and print

(6) Pick a proper retraction setting
Find the section with the minimal string, blobbing, and over/under extrusions. Then you will know which temperature to print with.

7. Other Causes
(1) Filament quality
Filament quality plays a crucial role in terms of the printing quality, and one way is through affecting the extrusion precision. A spool of wet filament can easily cause clogging issues. Check out my stringing troubleshooting blog which elaborated on fixing wet filament.
(2) Retraction distance too high
If your retraction distance is too high, more than 8mm, the feeder gear is more likely to grip on the same spot for more than one time. This behavior gonna grinds down the filament which makes it harder for the feeder gear to grab the filament and feed it in.
(3) Gap between Teflon tube and nozzle
Most of the Bowden-type Creality 3d printers aren’t using a throughout full-metal hotend, which means there might be a gap between the Teflon tube you inserted in and the nozzle. The gap is so close to the heat block that the filament gonna melt and fill into the gap and drag on the filament when feeding and retracting the filament. Upgrading to a full metal extruder or adding a metal throat tube will fix it.
(4) Nozzle too close to the platform
When the nozzle is too high from the build plate, the print is not going to stick well. So many of us turned to set the nozzle very close to the bed to get a thin first layer well attached. This is also a cause of clogging and grinding which finally leads to under-extrusion. The feeder gear gonna grind in the same place when the extruder can’t feed in more filament if not enough filament already came out from the nozzle.






.jpg)