Stringing, stringing, stringing! The most common but annoying 3d printing issue we both encountered especially in our novice stage. It seems to be able to sneak in any gap in the prints and ruthlessly ruin the fun of 3d printing! But do you know where these strings come from? And how to eliminate them for good? You will find the answer to it after reading this article!
Table of contents:
1. Retraction Distance Calibration
2. Printing Temperature Calibration
3. Filament Humidity solution
4. Flow rate Calibration
5. Other Tips
1. Retraction Setting
The first stop to eliminate stringing is through a proper retraction setting. The reason why you want to retract the filament is to prevent the melted filament from leaking when the nozzle travels through a print gap. In the slicer, you can adjust the retraction speed and distance. But how to optimize the figures to reach the best performance? That’s when you need a retraction test for your current 3d printer and filament (yes, figures vary from different extruders and filaments).
(1) Open Cura, click in the marketplace, then download calibration shapes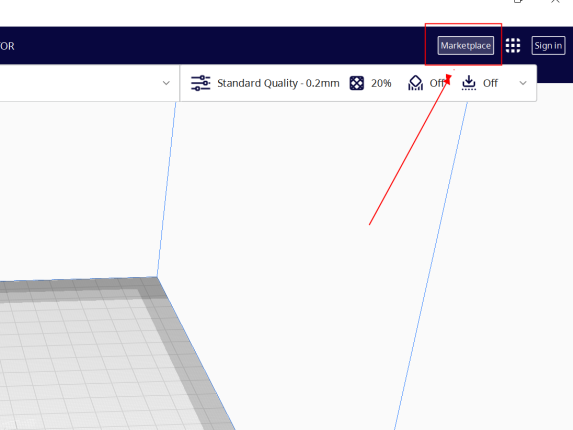
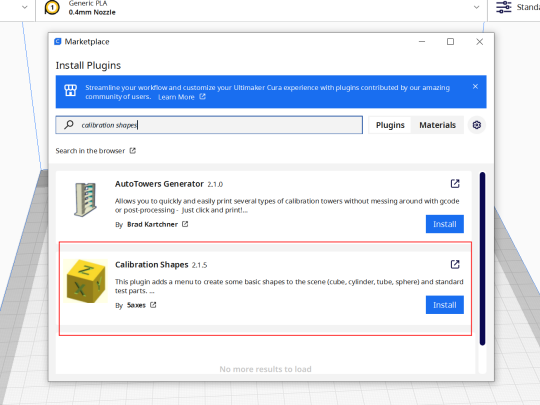
(2) Click “Add a Retract Tower” in “Part for calibration”, and create a retract tower
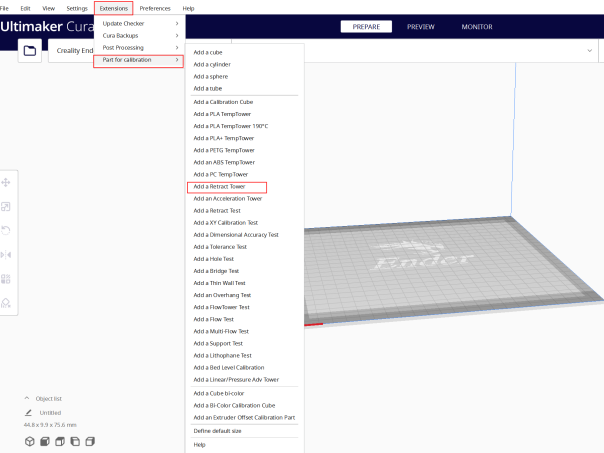
(3) Find modify G-code in post-processing, select retract tower
(4) Select “distance” in the command drop-down manual, then adjust the distance gap you want to test out. For instance, if you want to test the retract distance of 1~6mm, you will need to set the starting value of 1 and the value increment of 1.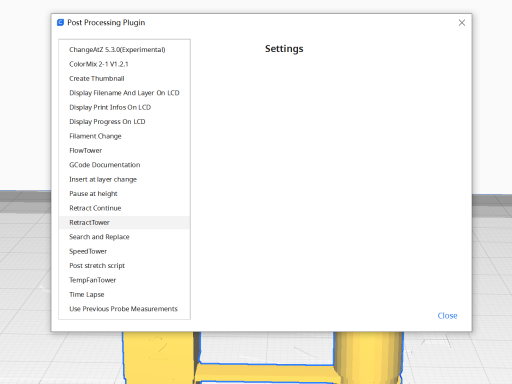
(5) Slice and print
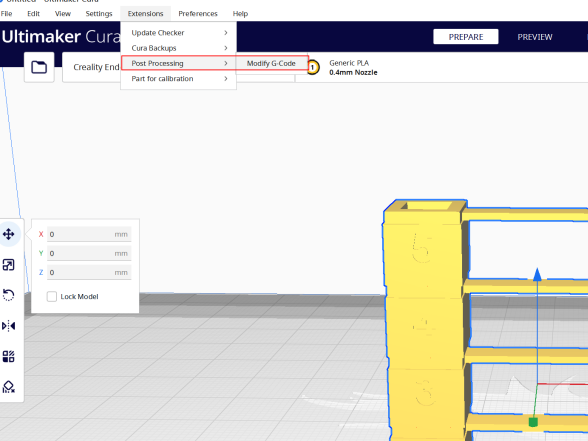
(6) Pick a proper retraction setting
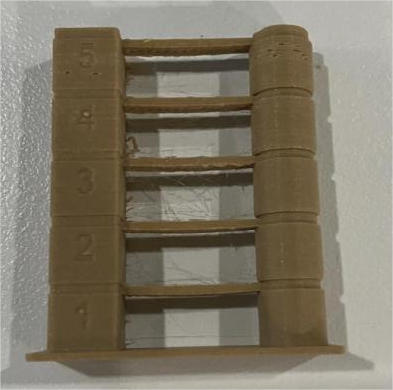
I did a test print to demonstrate how this retract tower works. This tower starts printing at 1mm retraction as I set in the Cura script option and add 1mm retraction per 38 layers (1 stage), so we get the result for 1~6mm retraction distance. Judging from the result, the best performing retract distance is 1~2mm for its minimized string and no under extrusion.
Check out this video for CHEP’s perfect retraction guidance: https://www.youtube.com/watch?v=6LjbCIGCmd0&t
2. Printing Temperature Calibration
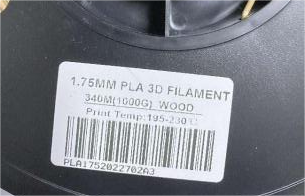
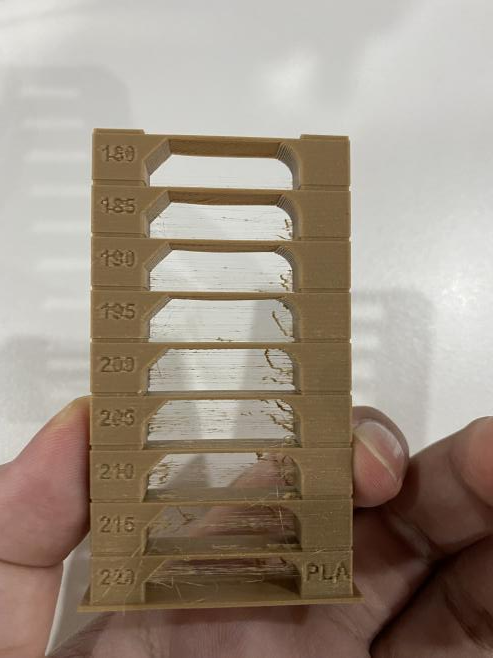
Before printing, I believe everyone read the recommended nozzle temperature on the spool. But you may notice the temperature gap is quite large to guess the best performing temperature for your 3d printer. For instance, this spool of wood filament indicates it can be printed under the circumstances of print temperature that falls into 195~230℃, but at what temperature should I tell my Ender-3 S1 in order to melt just adequate filament to complete the printing project?
(1) Similar to the retract test we did above, find “Add a PLA Temp Tower” in“Part for calibration”
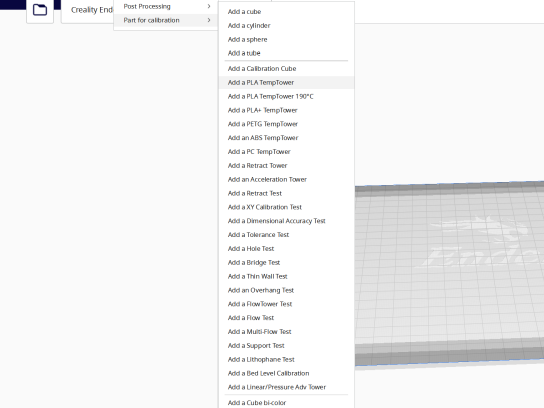
(2) Find modify G-code in post-processing, select TempFan tower
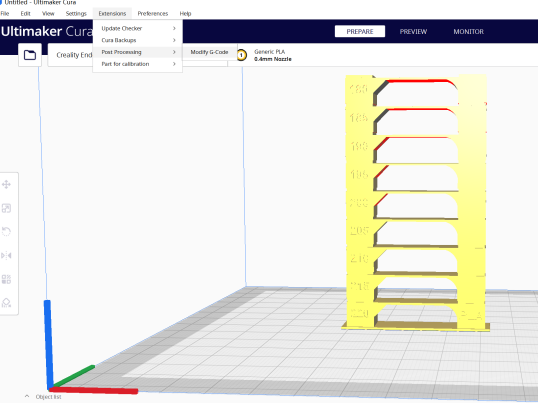
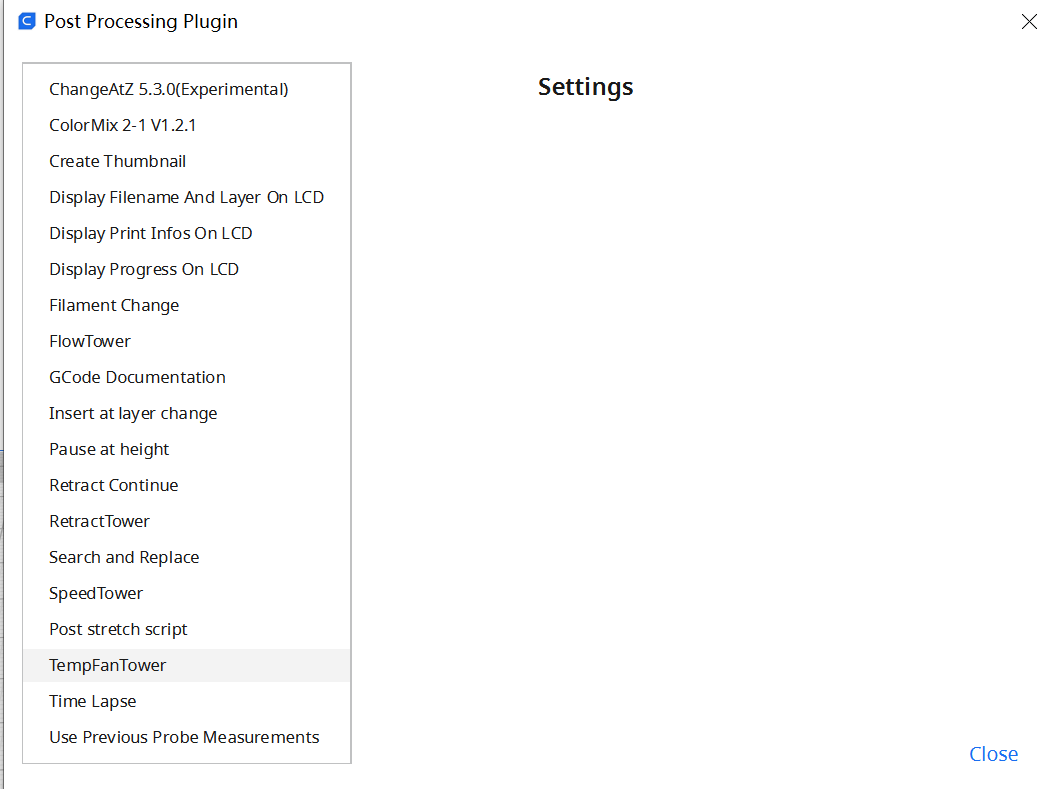
(3) Confirm if the default setting contains demanded temperature range
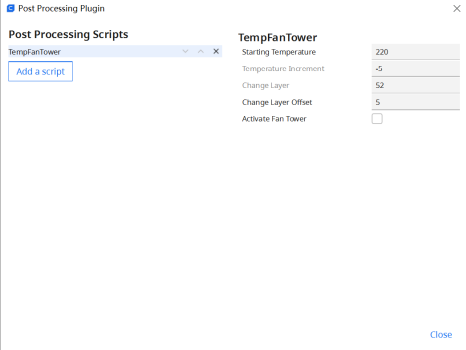
(4) Slice and print
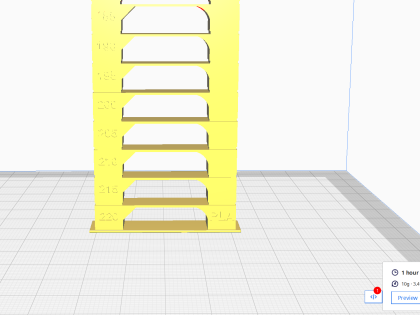
(5) Pick a proper retraction setting. Just like what we did above, find the section with minimal string, blobbing, and over/under extrusions. Then you will know which temperature to print with.
3. Filament Humidity solution
A spool of filaments can be faulty in many ways, undesirable factory recipe, despaired diameter, and the most seen moisture problem. Never underestimate the moisture in your filaments! It can cause extrusion issues from poor layer adhesion to all common print quality problems. Google “wet filament 3d print” images and your will have an idea about the disasters people encountered when printing wet filaments. The humidity issue is unavoidable as long as you can not consume the filament in a couple of weeks after unpackaging, especially for those who would like to maintain a wide filament choice for all time. So, what we can do to combat this ever-existing enemy of perfect prints?
Firstly, you will need to recognize wet filament before dealing with it. If you have encountered one or more issues listed below during printing, then you can’t ignore the possibility of the moisture issue.
a. Greatly reduction in filament strength, symptom is very likely to break if bent.
b. Greatly reduction in layer adhesion
c. Nozzle smokes during printing
d. Bubbling in extruded filament
e. Oozing
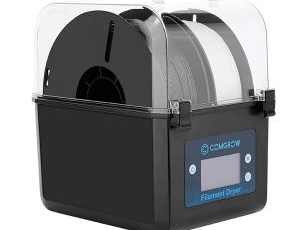
(1) Filament Dryer
A dryer dedicated to filaments is the best option. Compared to the food dryer you may own, a filament dryer has a containing space specially designed for filaments that can dry one or more spools of 1kg filaments. The whole design is to maintain a certain inside temperature for a period of time. For instance, if your PLA filament is having humidity issues, leaving it in the dryer for 3~4 hours under 40~45℃ will fix it. Check out our Comgrow 3D Filament Dryer Box if interested.
Below are the suggested heating temperature and drying periods for different types of filaments.
|
Filament Type |
Temperature(℃) |
Drying period |
|
PLA |
40~45 |
4 hours |
|
PETG |
55~60 |
6 hours |
|
TPU |
40~45 |
4 hours |
|
PC |
80~85 |
8 hours |
|
ABS |
65~70 |
6 hours |
|
Nylon |
75~85 |
6 hours |
(2) Dry in the oven
If you would rather save the money and use some household as a filament dryer, an oven is the most common application. It works like the filament dryer, leaving PLA filaments in the oven for 3~4 hours under 40~45℃ should fix the humidity. Though, the community is discussing the potential health risk if you dry the filament in the same oven you cook, for your unawareness of the filament recipe. That’s why I haven’t tried out this method and don’t suggest anyone try it.
4. Flow rate Calibration
Cura was set to extrude exact adequate filament to fill out the print width under a given nozzle type. Though, it is not able to consider the temperature factor, filament quality, nozzle condition and etc. All of the unconsidered factors lead to under/over-extrusion, or practically inconsistent preset flow rate and extruding pace, even if you already have a decent retraction setting. Basically, stringing may indicate the printer is extruding more than enough filament (over-extrusion). That’s why we need to calibrate the flow rate using a cube.
The "calibrate cube" will help you further to match the extruding speed and preset flow rate. This demonstration uses Cura as the slicer.
(1) Add a cube into your slicer (download calibration shapes in the marketplace if you haven’t)
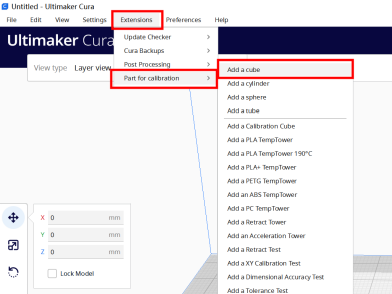
(2) adjusting the setting to the following value:
a. diameter: 20mm
b. top layer: 0
c. layer height: 0.2mm
d. infill density: 0%
e: printing speed: 50mm/s
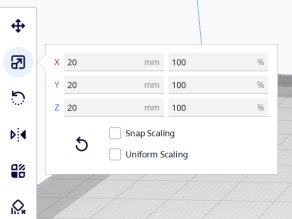
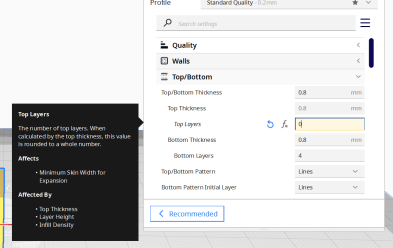
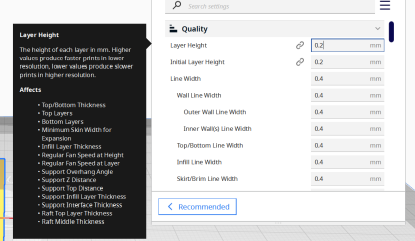
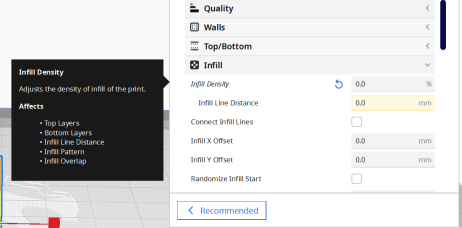
(3) Slice and preview the hollow cube
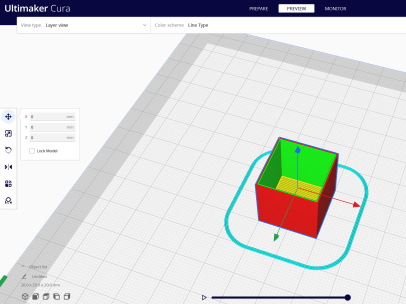
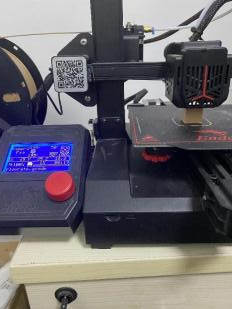
(4) Print the cube with a calibrated temperature (printed on Ender-2 Pro with wood PLA)
(5). Measure and record the wall width and print width
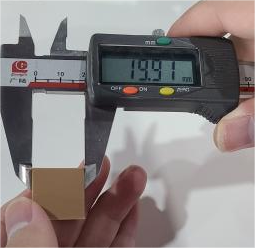
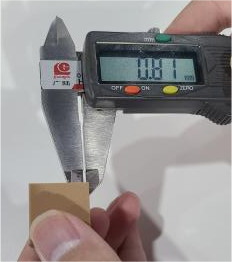
|
Wall width(mm) |
Print width(mm) |
|
|
Attempt 1 |
0.81 |
19.91 |
|
Attempt 2 |
0.78 |
19.96 |
|
Attempt 3 |
0.8 |
20.01 |
|
Attempt 4 |
0.79 |
19.95 |
|
Averaged value |
0.795 |
19.9575 |
|
Preset value |
0.8 |
20 |
|
Difference |
-0.625% |
-0.2125% |
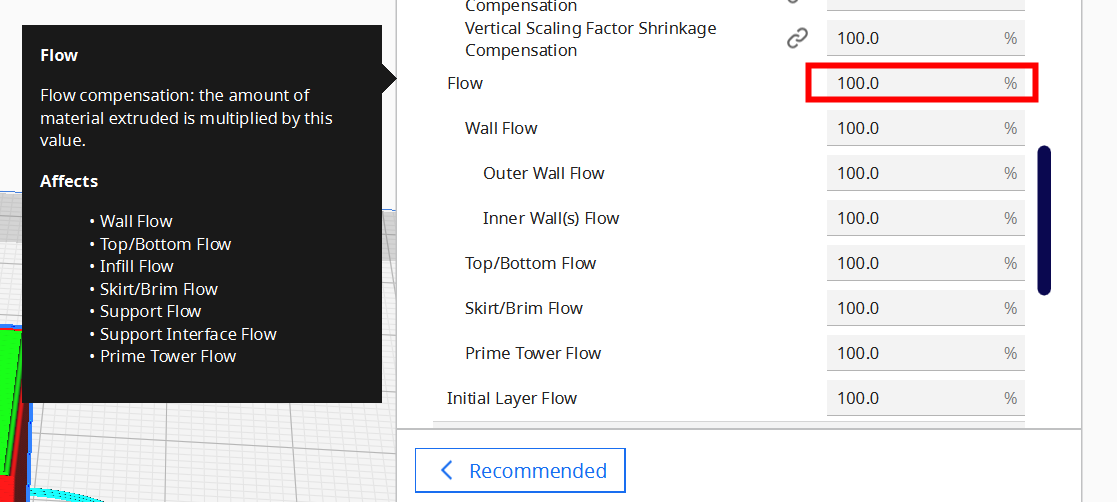
(6) Adjust the flow rate accordingly and repeat the test until satisfied
5. Other Tips
(1) Clean your nozzle
After printing dozens of projects, your nozzle is very likely to accumulate a thick layer of filament residuals. This layer's surface will try to stick with the print and cause stringing. Cleaning or changing your nozzle is suggested to be done when you observe the layer of residue.
(2) Switch to a direct drive extruder/printer
A direct drive extruder has better control over the flow rate since the gear is pushing near the heat block. While a Bowden-type extruder pushes the filament through a Teflon tube that allows filaments to bend and squeeze in the tube. The difference results in an obvious impact on the retraction setting that we normally set the retract distance around 1mm for the direct drive extruder and 6~8mm for the Bowden-type extruder. The small retract distance, the better the flow rate control for the extruder.
(3) Speed up
A shortcut to fix slight stringing is to speed up the printing. The scientific support behind it is we shorten the travel time of the gap which reduces the chance of oozing. Though, speeding up the printing process won’t fix the issue behind stringing. Also, you might end up with under extrusion and a decrease in print quality if the hotend isn’t able to melt enough filament or cause any mechanical issues due to faster printing. So, I would suggest calibrating the slicing options before using any tricks.








.jpg)