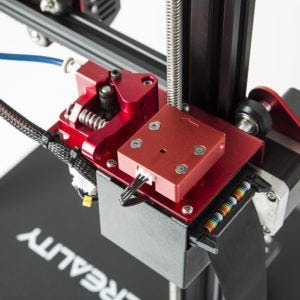
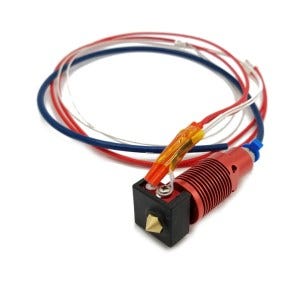
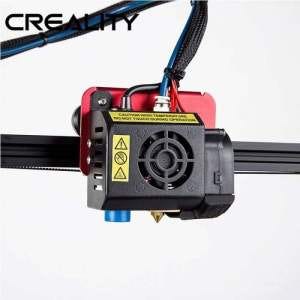
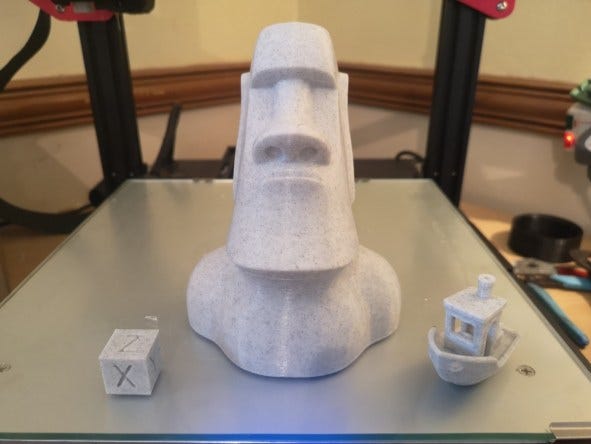
Now this may shock some of you but I bought my Creality CR10S Pro second hand. I was in the market for a new printer, something larger than my Ender 3 Pro and a friend was looking to downsize his considerable collection of 3D Printers. In all fairness to him, the Creality CR10S Pro was brand new & never used. I was lucky to get a good deal! Collecting the printer, I took it home in the front seat of my car, strapped in almost lovingly. Arriving back, I placed the Creality CR10S Pro on my desk and stopped to look at it. As printers go, it is attractive; the red anodised Aluminium contrasts well with the black aluminium frame. The electronics have all been moved “inboard” abandoning the older CR10 and CR10s designs which utilised an external control box separate from the printer itself. Construction of the CR10S Pro The aluminium frame is excellent. Using a 40x20mm aluminium extrusions for the Z-axis uprights with the hotend carriage running along the standard 20x20mm. I checked the frame, and everything was straight and true. With a painted black finish, the control box features a clear and easy to use touch screen. That replaces the dial control used on previous CR10 models. When switching the printer on you are greeted by the Creality logo. Once loaded, you will see the menu options, but these I will talk about later. Looking deeper into the changes Creality have made when updating the CR10, there is a lot to see. I like the dual z-axis screws that they have carried over from the CR10S model. It provides a much more stable x-axis for the hotend and carriage. Note: Creality has employed a stepper motor for each z-axis lead screw rather than running both from one and using a belt. The build surface on my Creality CR10s Pro was an aluminium plate with a build sticker. As I know, now the newer models come with a glass bed featuring the same build sticker. Unfortunately, as is often the way with aluminium beds, mine is warped. So I replaced it with a sheet of 4mm Borosilicate glass that I got cut by a local glazier for around £5 GBP. Also, the build surface has built-in build plate clips. These are great! No more binder clips being caught by printer nozzles on a wipe, just a rock steady bed. After checking over the machine a little deeper, we can see Creality have upgraded the usual silicone-based Bowden tube to a Capricorn tube. And that the bed springs are the stiffer “yellow” springs often retrofitted to the Ender 3 and other Creality 3D printers. They have even included little clips for the Bowden tube connectors. That most of us end up printing and fitting the large bed adjusting wheels that we saw on the Ender 3 Pro. Another point worth mentioning is that Creality has gone to a decent level of effort to tidy the wiring on this machine. To the extent than only one ribbon cable comes from the side of the machine to the area where the extruder and steppers receive power. Much neater than the previous Creality offerings such as the Ender 3 Pro where users often print cable chains as a means of getting that tidy look. One thing Creality have kept is the micro SD card format. I prefer a full-size SD card as the small ones are fiddly, especially if your printer is in an enclosure. Looking to the extruder we have a beautiful red anodised finish again matching a standard upgrade to Creality printers. Before the extruder, there is also a filament run-out sensor. That uses a blue LED light, will help to alert that the filament has run-out and saves the hotend position and temps for when you wish to restart the print. This same save procedure occurs in the event of power loss hopefully saving your print, back to the extruder itself. i see more improvements over the older designs again. The plastic components have been replaced with red anodised aluminium, and this version is Bond tech’s double gear mechanism. By using the double gear extrusion mechanism, it has twice the grip on the filament, ensuring reliable and smooth feed to the hot end. However, I have yet to test how well this will work with softer filaments such as TPU. At the hotend, we find Creality have again moved away from what’s been a previous stalwart for them. No longer do we find the MK8 hot end so familiar to Ender 3 and CR10 owners but a new proprietary hotend is used. Similar to previous versions, Creality is using a single fan for the parts cooler and another to cool the hot end. The parts cooling fan duct is 3D printed, and the STL is available on Thingiverse. I have been thankful for this as a part. Without the STL I would have had to order a replacement or print a non-standard duct. The Hotend heat sink is now round, secured using 2x M3 screws and using a familiar type of heater block thermistor and heater cartridge. We’ve seen these on the other models whereas the nozzles and heat break are different from the mk8 hot end. The nozzles now run an M6x0.75mm thread, and only one included with the 3D printer, a standard 0.4mm. I have yet to try a different diameter nozzle in my CR10s Pro as I find the 0.4mm has suited my printing needs admirably to date. Crealitys decision to fit a capacitive level sensor to the Creality CR10s Pro is questionable in my mind. I feel a contact probe such as the BL Touch would have been a better choice, as this is not affected by temperature fluctuations. As a capacitive sensor can be, and won’t have sensitivity issues, but they have gone so far. As to provide an acrylic shim and feeler gauge to allow you to set the height of the probe. Correctly relative to the height of the nozzle at 0.2mm from the print surface. However, the instructions included for how to set this up are awful, a much more precise explanation of this can be found here from Tiny Machines. Please note: The level sensor has replaced the physical z stop switch. If your sensor fails or is incorrectly set, it’s straightforward for your nozzle to crash into the print bed. Some hidden upgrades warrant a mention. The upgraded V2.4.1 mainboard along with being very quiet offers increased stability and reliability over previous versions. It has TMC drivers who assist in the noise reduction as well as eliminate salmon skin effects that have previously been seen by people fitting TL Smoothers. An upgraded power supply sees Creality returning to using Meanwell as they did in the Ender 3 Pro, giving a more stable voltage to the printer and the comfort of a named brand. The Creality CR10s Pro comes with a boot loader pre-installed so flashing the firmware is very simple. Therefore it was one of the first things I did with my machine because from the factory the Thermal runaway protection is not enabled. I find this odd as the features are already there in Marlin. One thing to note, if you’re going to flash your mainboard you will have to flash your LCD as well. This is simple enough and can be done using a micro SD and the reader fitted to the LCD PCB board. I used the Tiny Machines Firmware and had no issues at all. The LCD touchscreen is large and easy to navigate. The icons make sense, and the writing is clear. While you don’t have direct access to read some of the settings as you would have an Ender 3 Pro, you can get by. A good thing to know is that the Creality CR10s Pro will only read STL files in the root directory of the SD card and not in folders. I like this printer. I like it a lot! It looks cool, and it is quiet; however, the loudest part of the printer is the cooling fans. I’m sure anyone who must have it quieter could fit some lower Db ones. As this is an honest review, I do need to point out the failings. The quality of the screws on the hot end carriage is poor. Using the supplied Allen keys, it wouldn’t be hard to round them off. From the factory, my bed is warped; however, I do believe the newer models now ship with a glass bed. Thermal runaway protection was not active on my Creality CR10S Pro. in my mind, this is a massive failure that needs to be rectified in the firmware before the printers ship. However, despite all of this, I still really like this printer! So much so I am considering buying its big brother the CR10S5! I hope you enjoyed our review! Why not check out the Longer Lk4 review or Creality 3D Scanner — Must have or Gimmick? Originally published at https://www.inov3d.net/creality-cr10s-pro-review?fbclid=IwAR2tY9WrbxFlxRVRtbOPk4HvZLPzw7XMLdUnnlow2QtGN3c9mhuPWFotipI Let us discuss some of the specifications on the CR10S PRO
Build Surface
CR10S Pro Hotend
Levelling Sensor
CR10S Pro Software interface
Modifications
Final Thoughts on the Creality CR10S Pro?
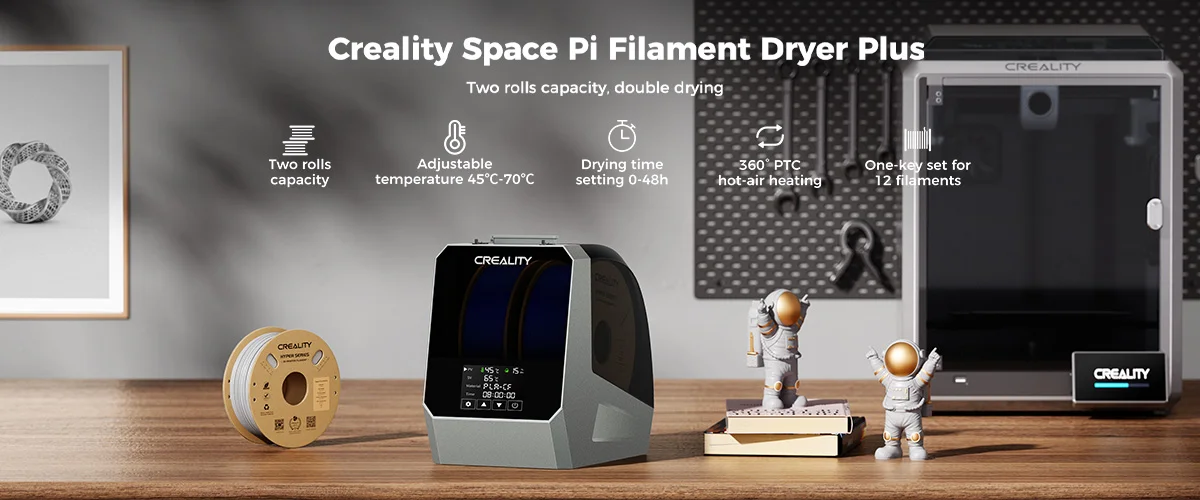
Ensure perfect 3D prints with Creality Space Pi Filament Dryers. These dryers eliminate moisture with advanced PTC heating, maintaining optimal filament condition for smooth and consistent printing results. Perfect for any 3D printing enthusiast.
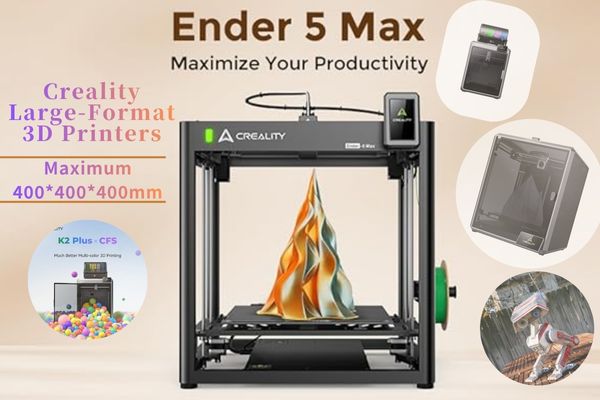
1.Creality Ender-5Max 3d Printer - 400*400*400mm build volume
2.Creality K2 Plus Combo 3d Printer - 350*350*350mm build volume
3. Creality K1 Max 3d Printer -300*300*300mm build volume
4. Creality K2 Pro Combo 3d Printer -300*300*300mm build volume
5.Creality K2 Combo 3d Printer - 260*260*260mm build volume
.jpg)
Discover the Creality K1 Max, the best home 3D printer. With a 300x300x300mm build volume, 600mm/s print speed, and eco-friendly efficiency, it redefines speed, precision, and reliability. Perfect for hobbyists and professionals, elevate your 3D printing with the K1 Max.


